
If you’re tired of missing shots or feeling like your crosshair has a mind of its own in Free Fire, you’re in the right place. This guide is for casual and competitive players who want to find their optimal sensitivity settings without copying random codes from the internet. By the end, you’ll have a personalized sensitivity profile that feels natural and improves your aim consistency.
We’ll walk through accessing the settings, understanding each slider, testing them systematically, and avoiding common pitfalls. You don’t need any special tools—just your phone, a bit of patience, and 30 minutes in the training ground. Let’s get started!
What You’ll Need
- Free Fire installed on your mobile device
- A stable internet connection
- Patience to test each setting multiple times
- Optional: a friend to practice in Clash Squad mode
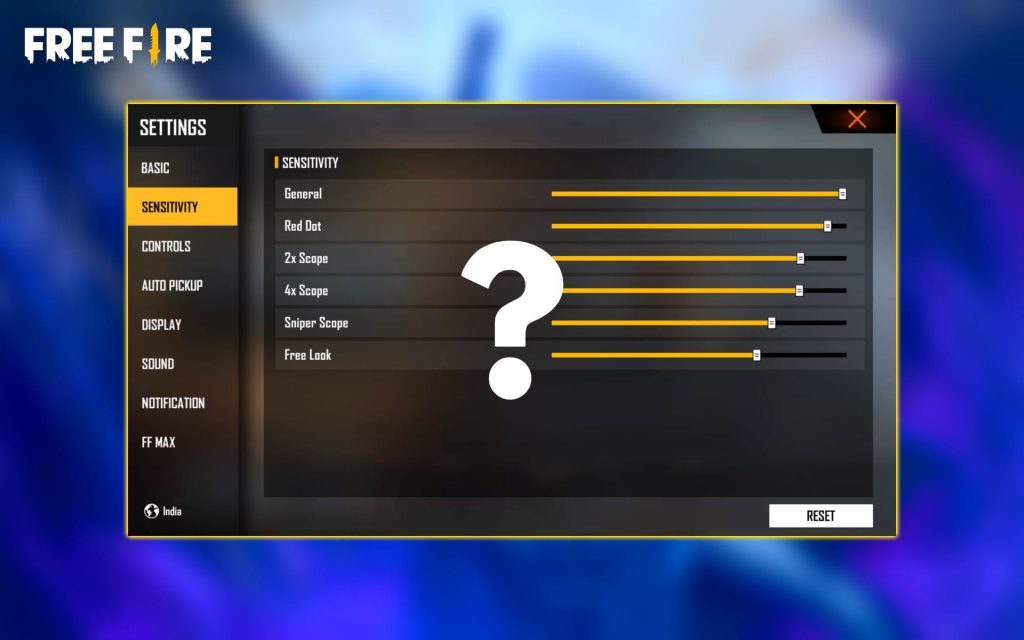
Step 1: Access the Sensitivity Settings
Open Free Fire and tap on the gear icon (Settings) on the main lobby screen. Then go to the ‘Controls‘ tab. Scroll down until you see the ‘Sensitivity’ section. This is where all the magic happens. Tap on ‘Custom’ to unlock the sliders if they’re greyed out.
Step 2: Understand the Different Sensitivity Options
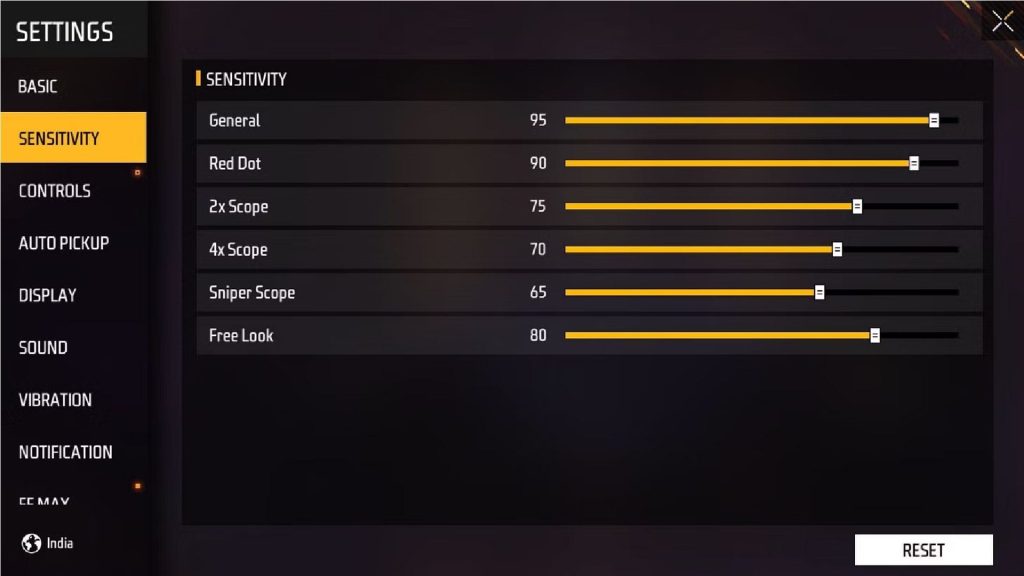
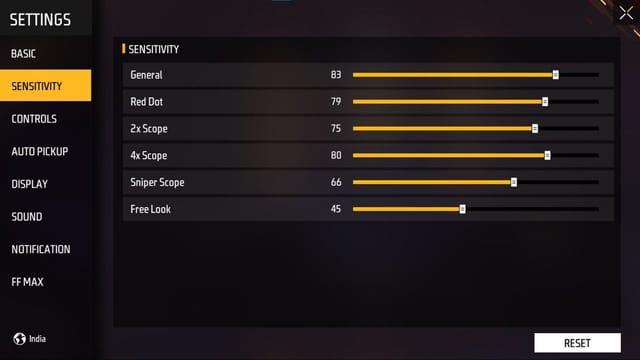
Free Fire has three main sensitivity categories: General, Red Dot/Holographic, and Scope sensitivities. General affects normal looking and aiming without a sight. Red Dot applies when using a 1x scope or holographic sight. Scope sensitivities are for higher zoom scopes (2x, 4x, etc.). Each category has sliders for Camera (movement when not firing), ADS (aim down sights), and sometimes Gyroscope (if enabled). We’ll focus on the basics.
Step 3: Adjust Your General Sensitivity First
Start with General Camera and General ADS. Set both to around 80-90 as a baseline (most pro players use 90-100 for mobile). Then head to the Training Ground. Practice moving your finger across the screen—your crosshair should follow smoothly without overshooting or feeling sluggish. If it’s too fast, lower by 10; if too slow, increase by 10.
Step 4: Test with Aim Training or Practice Range
In the Training Ground, use the moving targets or the dummy bots. Try tracking them while shooting. Also practice flicking quickly to a target. Record how often you hit headshots versus body shots. If you’re overcompensating (crosshair goes too far), reduce sensitivity. If you’re undershooting, increase it. Do this for both Camera and ADS until you feel consistent.
Step 5: Fine-Tune ADS and Scope Sensitivities
Now repeat the same process for Red Dot and Scope. Use a weapon with a red dot sight and practice in the range. scopes like 2x and 4x require lower sensitivity because they magnify movement. A good starting point: Red Dot ADS at 80, 2x at 60, 4x at 40. Adjust based on your comfort—too high and you’ll miss targets, too low and you’ll be slow to react.
Step 6: Repeat in Different Scenarios
Finally, play a few real matches (Clash Squad or Classic) with your new settings. Pay attention to close-range fights (smg/shotgun) vs long-range (AR/sniper). You might need to tweak further. For example, if you’re a close-range rusher, keep general sensitivity high. If you snipe a lot, lower your scope sensitivity. Don’t be afraid to go back to the training ground after each match.
Common Pitfalls
- Copying others’ sensitivity codes blindly without testing your own finger movements. Everyone has different hand size and touch screen sensitivity.
- Ignoring the gyroscope settings. If you have gyro enabled, you’ll need to adjust both camera and gyro sensitivities together. Start with gyro off if you’re a beginner.
- Changing too many sliders at once. Make one change, test it, then adjust another. Otherwise you’ll have no idea what worked.
Where to Next
Now that you have a solid sensitivity setup, the next step is mastering movement (like jiggle-peeking and slide-canceling) and crosshair placement. Check out our guide on Free Fire advanced movement techniques to take your gameplay to the next level.
