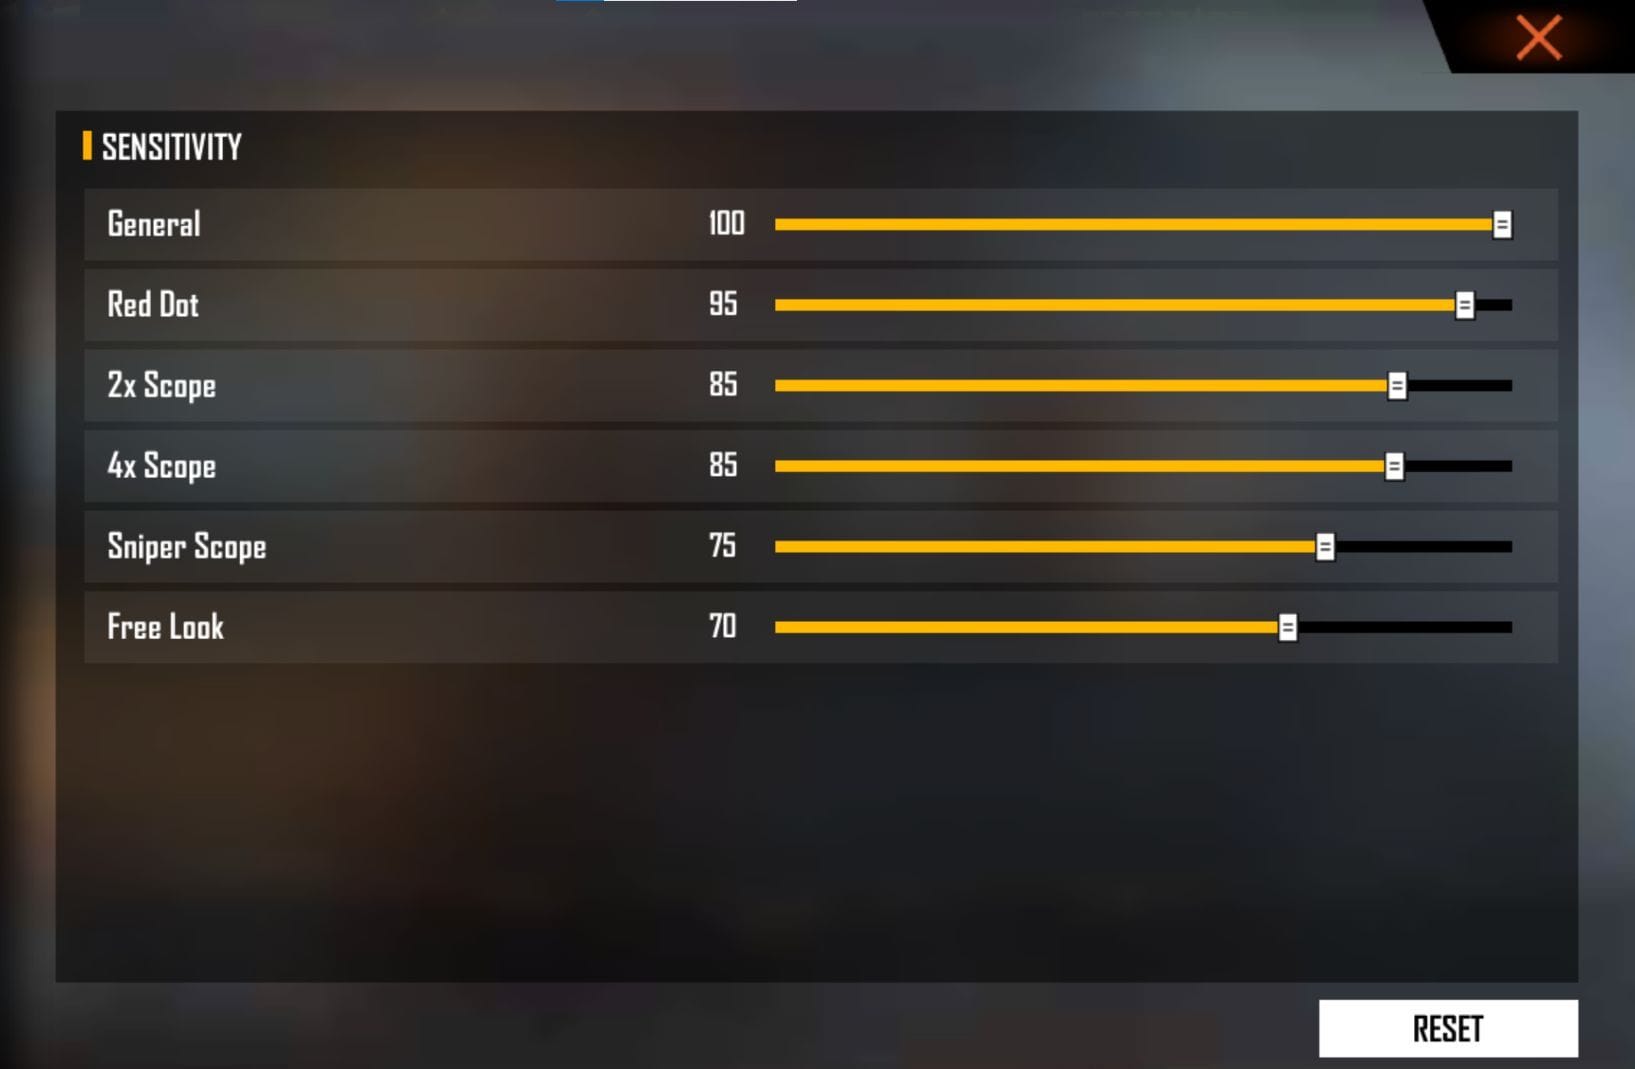
If you’re a Free Fire player who constantly loses gunfights because your crosshair flies past enemies or you can’t keep up with their movement, this guide is for you. Tracking enemies smoothly is one of the most important skills in the game, and it all starts with your sensitivity settings. Whether you’re on a budget phone or a flagship device, dialing in the right numbers will make you feel like a pro.
By the end of this tutorial, you’ll have a personalized sensitivity profile that lets you stick to moving targets like glue. We’ll walk through general sensitivity, scope settings, and DPI adjustments, then test them in the training ground. You’ll be ready to win more fights in ranked matches.
What You’ll Need
- Free Fire installed on your mobile device
- A stable internet connection
- At least 15 minutes of uninterrupted practice time
- Patience to tweak and test settings
Step 1: Understanding Sensitivity Basics
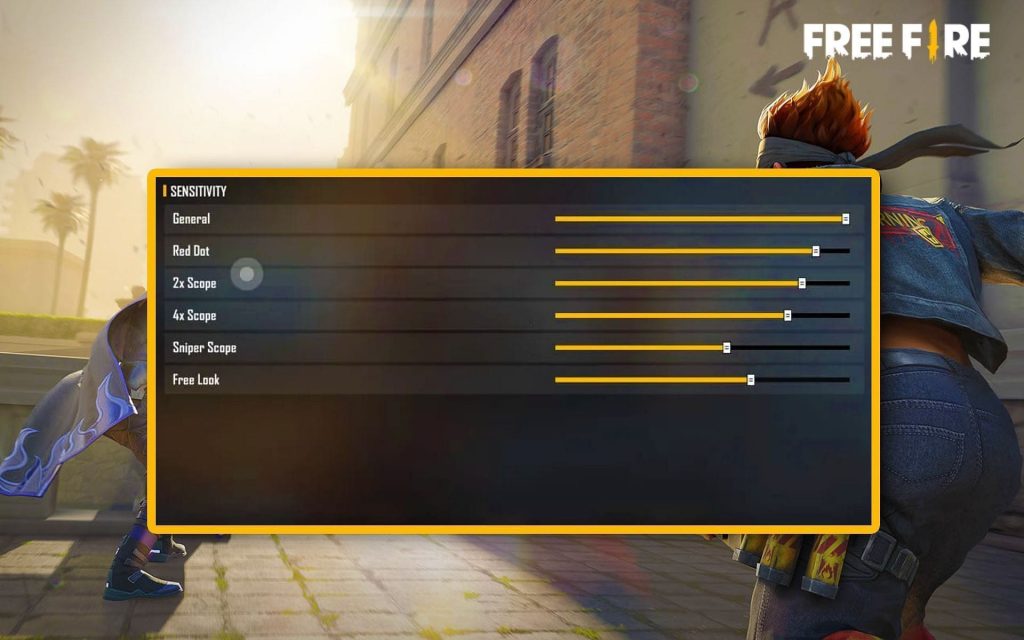
Free Fire sensitivity is divided into several categories: General (hip-fire), Red Dot, 2x Scope, 4x Scope, Sniper Scope, and Free Look. For tracking enemies in close to mid-range fights, you’ll mainly adjust General, Red Dot, and 2x settings. DPI (dots per inch) also plays a role—it controls the speed of your touch input. Most devices have a default DPI, but you can change it in the game settings. Head to the settings menu by tapping the gear icon on the main screen, then select ‘Sensitivity’.
Step 2: Adjusting General Sensitivity
General sensitivity affects your aim when not using a scope. For smooth tracking, set it between 75 and 85. Start at 80. If you find yourself over-aiming (crosshair swings past the enemy), lower it by 5. If you’re too slow to keep up, increase by 5. Tap on the General setting bar and drag it to your desired value. Don’t forget to save after changes.
Step 3: Tuning Red Dot and 2x Scope
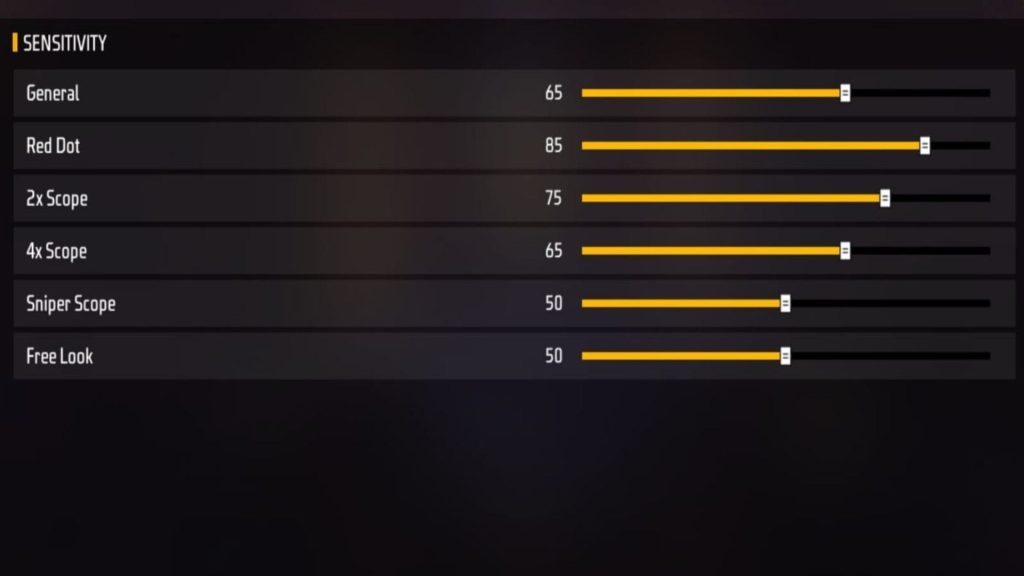
The red dot sight is common for tracking enemies at medium range. Set it to 70–80. A lower value gives more control, but you need enough speed to follow strafing enemies. For the 2x scope, use 60–70 because it magnifies movement. Test both in the training ground—stand close to the bots and try to keep your crosshair on them as they move. Adjust in 5-point increments until it feels natural.

Step 4: Fine-Tuning with DPI
Under the Sensitivity menu, you’ll find a DPI option (if your device supports it). A DPI of 1600 to 2000 is a good starting point for tracking. Higher DPI makes your aim faster but can be jittery; lower DPI is slower but smoother. Set it to 1800 and test. If you feel you have to swipe too far to turn around, increase DPI. If your aim is shaky, decrease it.
Step 5: Testing in Training Ground
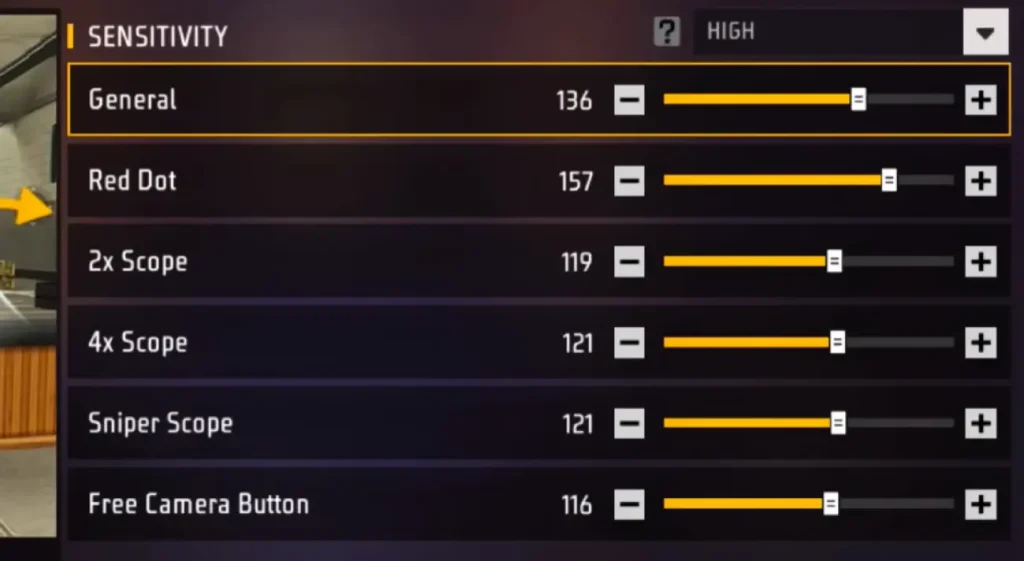
Go to the training ground by tapping ‘Training’ on the main menu. Equip a weapon with a red dot or 2x scope. Practice tracking bots as they run left and right. Focus on keeping your crosshair on their body, not just following. If you overshoot, lower the corresponding sensitivity. If you lag behind, increase it. Do this for 5–10 minutes until tracking feels effortless.
Step 6: Final Adjustments in Real Matches
After training, play a few casual matches. Pay attention to how your aim feels in actual combat. Are you losing fights because your crosshair is off? Make small adjustments—2–3 points at a time. Remember, sensitivity is personal; what works for a YouTuber might not work for you. Keep tweaking until you consistently win close-range duels.
Common Pitfalls
- Setting sensitivity too high: It makes your aim jerky and causes over-aiming. Start lower and gradually increase.
- Ignoring DPI: DPI changes the feel dramatically. Don’t skip it—adjust it along with sensitivity.
- Not testing in training ground: Jumping straight into ranked matches with new settings will hurt your rank. Always practice first.
Where to Next
Now that your tracking is smoother, you can focus on other skills like recoil control and movement. Check out our guides on Free Fire aim drills and crosshair placement. Practice daily, and you’ll climb the ranks in no time.



