If you’ve been struggling with aiming in Free Fire or feel like your controls are holding you back, you’re in the right place. This guide is for anyone who wants to dial in their sensitivity settings and create a custom HUD that fits their playstyle — whether you’re a two-thumb casual or a three-finger claw tryhard. By the end, you’ll have a personalized setup that makes spraying, flicking, and building feel effortless.
We’ll walk through adjusting each sensitivity slider, then move on to rearranging your HUD buttons for maximum efficiency. You’ll also learn how to test your settings in the training ground and save a backup code. Let’s get started.
What You’ll Need
- Free Fire or Free Fire Max installed on your phone
- A stable internet connection
- At least 10 minutes of free time
- Optional: a friend to help test in Clash Squad
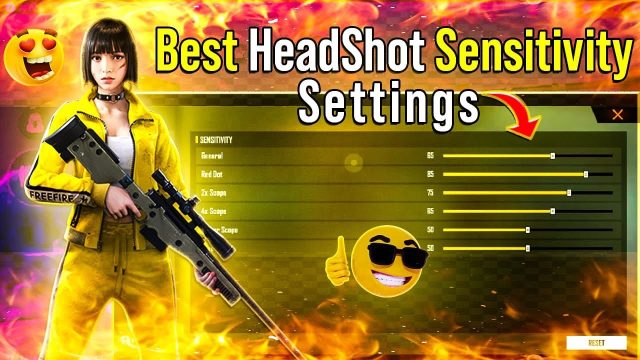
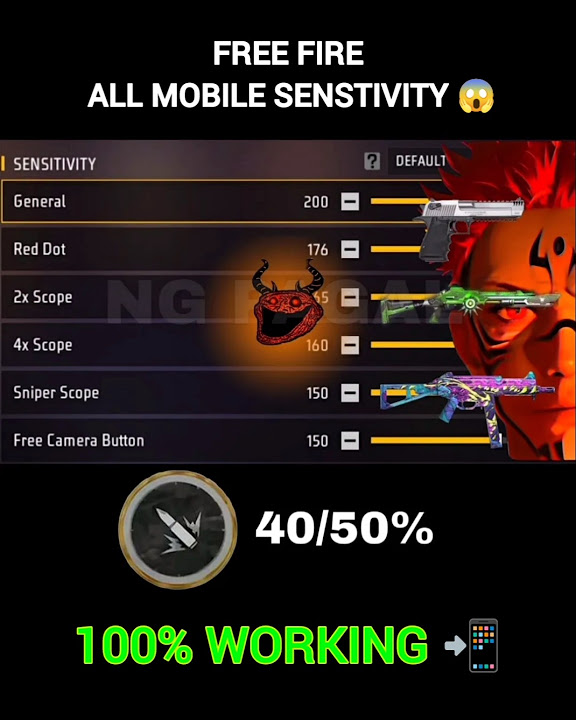
Step 1: Understand the Sensitivity Sliders
Open Free Fire and go to Settings > Sensitivity. You’ll see multiple sliders: General, Red Dot, 2x Scope, 4x Scope, Sniper Scope, and Free Look. Each controls how fast your crosshair moves when you swipe. Higher numbers mean faster turns, but too high can make aiming jerky. Start with a balanced setup — you can always tweak later. If you want a baseline, check out our free fire sensitivity settings balanced sensitivity guide.
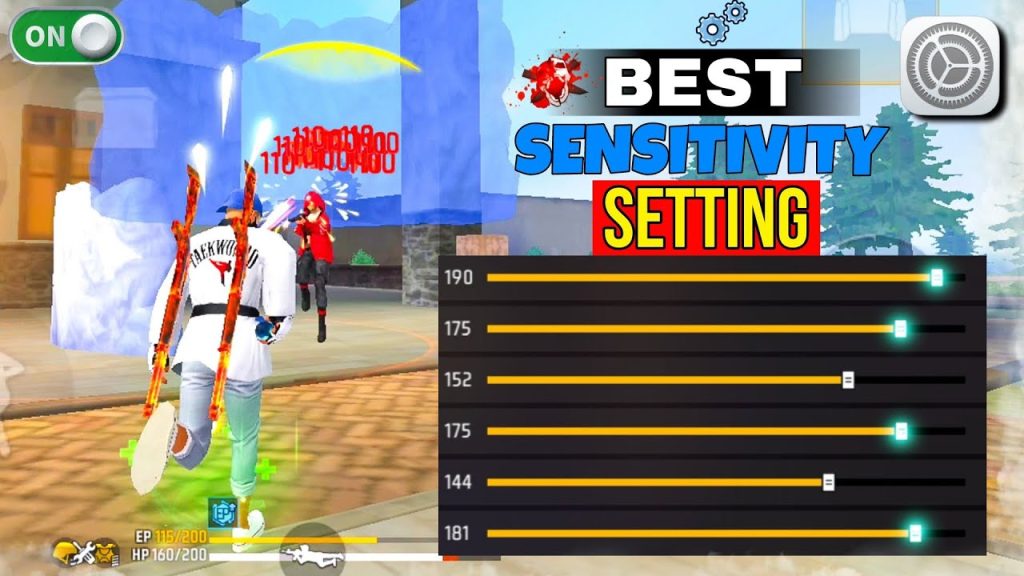
Step 2: Adjust Your Sensitivity Sliders
Set General to 80-90 for fast 360s. For Red Dot, keep it around 70-80 for precise sprays. Scopes should be lower: 2x at 60, 4x at 40, Sniper at 30. Free Look can stay at 50. These numbers work for most players, but if you main a specific weapon like an AK or M1014, fine-tune accordingly. For spray control, our free fire sensitivity settings for spray control post has weapon-specific tweaks.
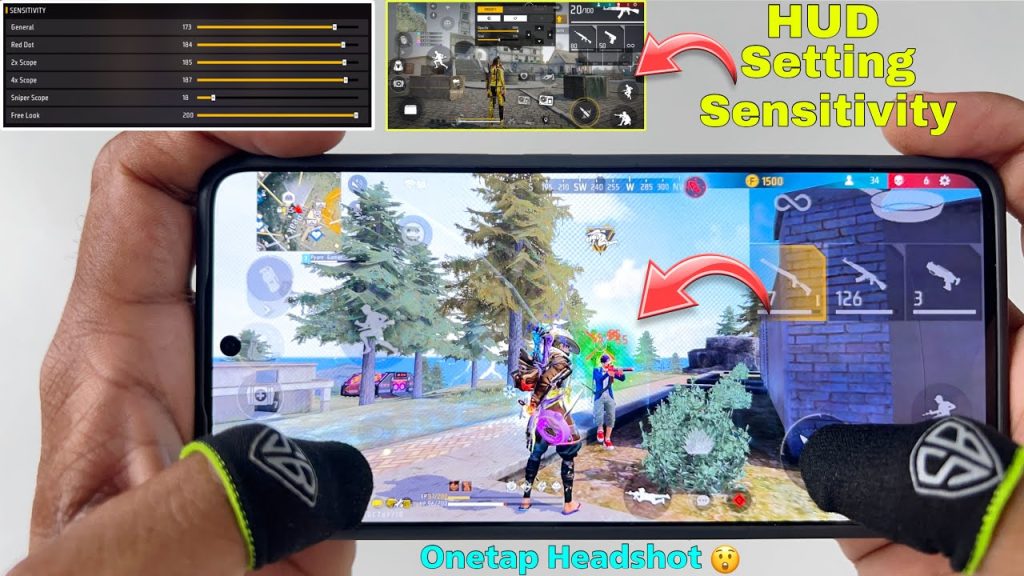
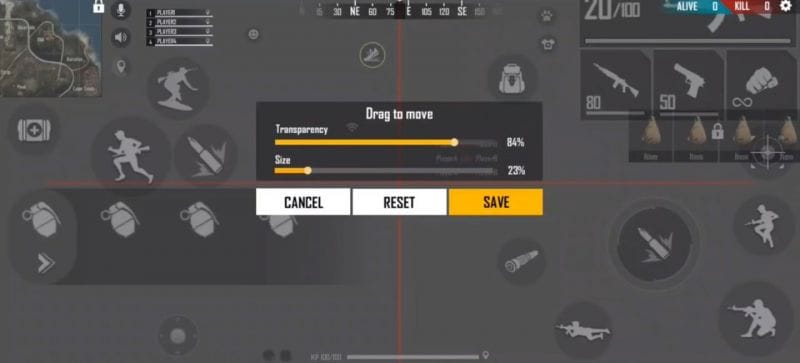
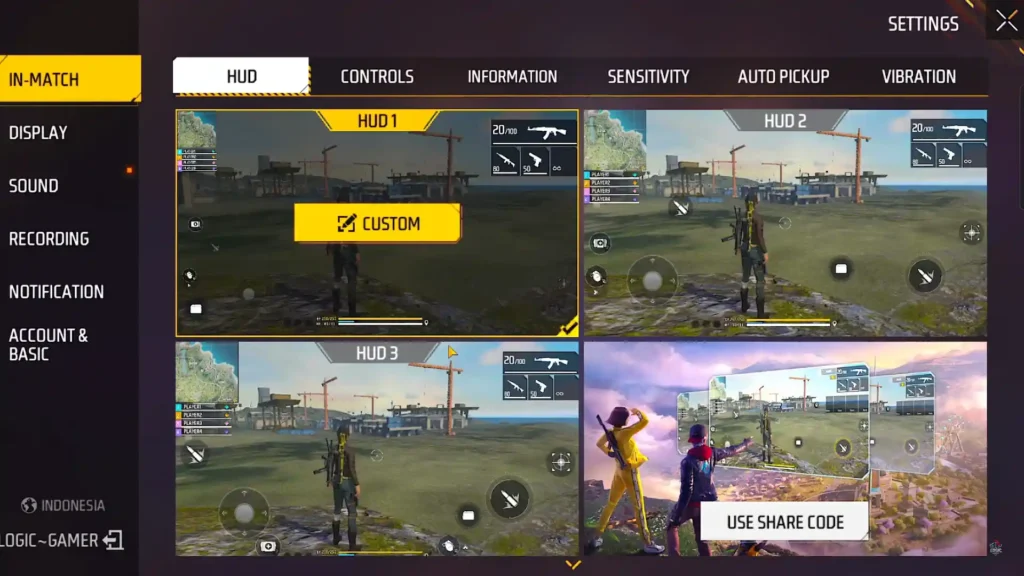
Step 3: Customize Your HUD Layout
Exit sensitivity settings and go to Settings > Controls > Custom HUD. Here you can drag and resize every button. For two thumbs, keep fire and aim close together. For three or four fingers, spread out buttons so each finger has a dedicated action. If you play with three fingers, our free fire sensitivity settings with 3 finger claw guide shows a popular layout.
Step 4: Test and Fine-Tune in Training Ground
Hit the training ground and practice shooting at static and moving targets. Adjust sensitivity if your aim overshoots (too high) or undershoots (too low). Also test your HUD: can you easily hit the prone button while firing? If not, rearrange. For headshot practice, check our free fire max sensitivity settings for headshot guide. Once you’re comfortable, play a Clash Squad match to test under pressure — see our free fire sensitivity settings tested in clash squad for real-world feedback.
Step 5: Save and Backup Your Settings
Go back to Settings > Sensitivity and tap the backup icon (cloud with arrow up). This generates a code you can save or share. To restore, use the import function. Watch our how to import free fire sensitivity settings guide for step-by-step help. Always keep a backup — if you change devices or reset, you won’t lose your setup.
Common Pitfalls
- Copying a pro’s settings without adjusting for your device’s screen size and DPI. What works on an iPad may feel sluggish on a small phone.
- Setting sensitivity too high because it looks cool in clips. High sensitivity can make micro-adjustments impossible — start low and increase gradually.
- Ignoring HUD clutter. Too many oversized buttons can block your view. Keep only essential buttons visible and resize them to fit your thumb reach.
Where to Next
Now that you’ve got your sensitivity and HUD dialed in, keep practicing. Try different weapon combos and adjust sliders as you improve. For more advanced tips, dive into our other guides like free fire sensitivity settings for spray control or free fire max sensitivity settings for headshot. Happy gaming!