
Tweaking your sensitivity in Free Fire can be a huge time sink. You drop into the training ground, fire a few rounds, adjust a slider, repeat – and still end up with shaky aim. That’s where a Free Fire sensitivity settings simulator comes in. Instead of guessing in real matches, you can test and fine-tune your settings in a virtual environment that mirrors the game’s controls. This guide is for anyone who wants laser-like aim without the hours of trial and error. By the end, you’ll know how to use a simulator to dial in your DPI, general sensitivity, and scope sensitivities, then apply those settings to your actual game.
Think of the simulator as your personal aim lab. You can simulate different mouse or thumb DPI, adjust every slider, and see how your crosshair reacts instantly. No pressure from enemies, no wasted matches. Whether you’re a claw player or a two-thumb beginner, this tool helps you understand what works for your style. Plus, you can even copy settings from pros and tweak them without ever leaving your browser. Ready to stop guessing and start landing headshots? Let’s dive in.
What You’ll Need
- A smartphone or PC (the simulator works on both, but most are web-based)
- Free Fire installed on your device (to apply the final settings)
- A stable internet connection (to load the simulator and sync settings)
- Optional: a sensitivity settings generator app for quick presets
Step 1: Choose a Simulator Platform
First, find a reliable Free Fire sensitivity simulator. Many websites offer these tools for free. Look for one that lets you adjust DPI, general sensitivity, red dot, 2x scope, 4x scope, and sniper scope separately. A good simulator will also include a test area where you can move your crosshair and see the exact pixel movement. I recommend checking out a sensitivity settings generator that also simulates the game’s feel. Open the simulator on your browser or download a dedicated app if available.
Step 2: Set Your Target DPI
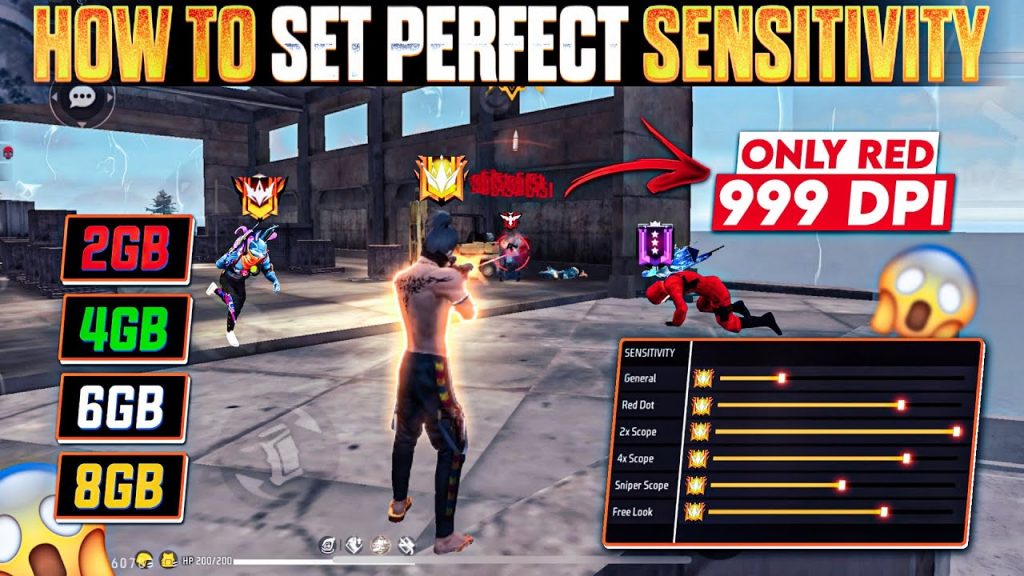
DPI (dots per inch) is the foundation of your aim. If you play on a phone, your thumb’s effective DPI is determined by your touchscreen sensitivity setting. On PC, it’s your mouse DPI. In the simulator, input your current DPI or the DPI you plan to use. For most mobile players, a DPI between 400 and 800 is common. If you’re unsure, start with 600 and adjust later. The simulator will calculate the ideal sensitivity range based on your DPI.
Step 3: Adjust General Sensitivity
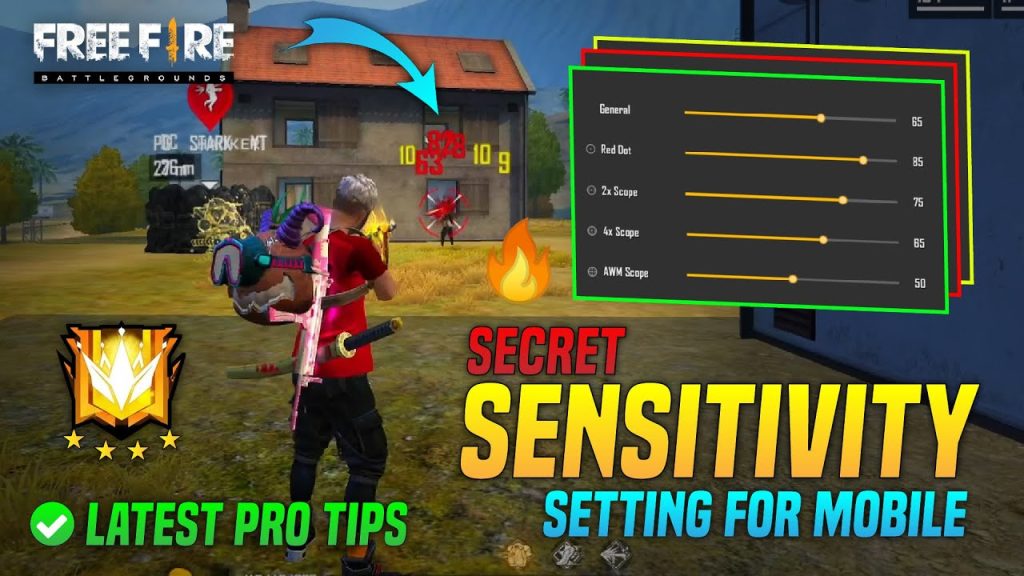
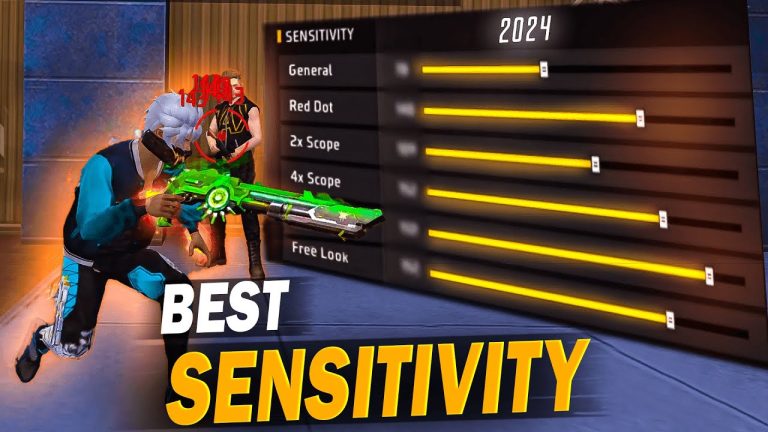
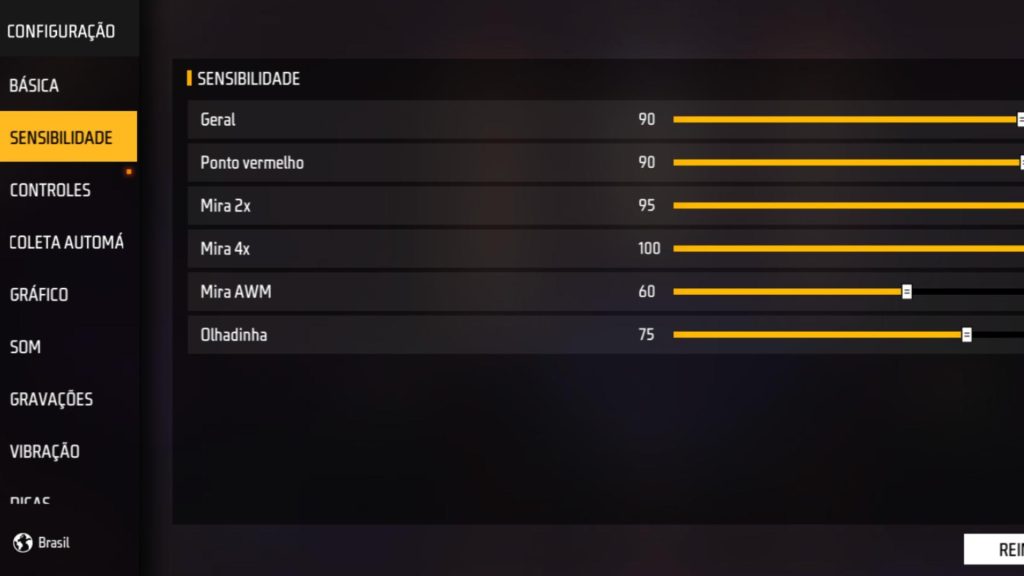
Now move to the general sensitivity slider. This controls how fast your crosshair moves when you drag your thumb or mouse. In the simulator, drag the slider and practice a quick 180-degree turn. You want it fast enough to react but slow enough to track. A good starting point is 90-100 on a 5:5 ratio. Test by flicking to a target. If you overshoot, lower it; if you undershoot, raise it. Remember to match your in-game settings later. Use the simulator’s test mode to compare with aggressive sensitivity settings used by rushers.
Step 4: Configure Scope Sensitivities
Scope sensitivities are crucial for mid-to-long range engagements. In the simulator, you’ll find separate sliders for red dot, 2x, 4x, and sniper scopes. Drag each one and test by aiming at a static target. The goal is to have a smooth, steady aim without jitter. For most players, red dot and 2x should be slightly lower than general sensitivity (around 70-80), while sniper sensitivity can be lower to avoid over-aiming. Refer to the best free fire sensitivity settings for headshots as a baseline. The simulator lets you lock these values and see instant feedback.

Step 5: Test with Sample Scenarios
Many simulators include a mini-game or target range to test your settings in motion. Use this to simulate real combat: track a moving target, flick between enemies, and hold steady for a headshot. Pay attention to how your crosshair behaves. If you experience over-aiming, reduce DPI or general sensitivity. If you can’t keep up with the target, increase a bit. This is also a great time to how to test your sensitivity thoroughly without wasting in-game resources. Some simulators even track your accuracy percentage.
Step 6: Apply Settings In-Game
Once you’re happy with your simulator results, open Free Fire and navigate to Settings > Sensitivity. Input the exact values you found. Some simulators have an export feature; if not, screenshot the sliders. Apply them and jump into the training ground to confirm everything feels the same. Make minor tweaks if needed. For ongoing improvement, consider using a sensitivity settings optimizer to periodically refine your numbers. Also check sensitivity settings for tracking enemies if you play a support style.
Common Pitfalls
- Not matching DPI to your real device: The simulator’s DPI setting must match your actual phone’s touch sensitivity or mouse DPI. Otherwise your in-game feel will be off by a lot.
- Ignoring ADS (aim down sight) sensitivity: Many players only adjust general sensitivity and forget that scope-specific settings matter just as much. Use the simulator to fine-tune each scope.
- Copying pro settings blindly: A simulator helps you adapt pro settings to your own hardware and play style. Don’t just copy the numbers — test them. What works for a two-thumb player may not work for a claw user.
Where to Next
Now that you’ve mastered the simulator, take your aim to the next level by exploring more advanced techniques. Check out guides on how to export your settings to share with friends, or learn about game boosters that can reduce input lag. The simulator is just a tool — consistent practice in the training ground and real matches is what builds muscle memory. Remember to revisit your settings after a major Free Fire update, as sensitivity values sometimes change. Good luck, and see you on the battlefield!
