If you’re playing Free Fire on Garena servers, you know that split-second accuracy can make or break your game. This guide is for beginners and intermediate players who want to dial in their sensitivity settings without spending hours in the training room. By the end, you’ll have a solid baseline that you can fine-tune for your playstyle.
Garena servers have their own ping and response nuances, so generic sensitivity codes from other regions might not feel right. We’ll walk through the recommended settings, how to test them, and how to adjust for your phone and touch response. Plus, we’ll link to other guides that dive deeper into specific styles, like trusted free fire sensitivity settings and free fire sensitivity settings for movement control.
What You’ll Need
- A Free Fire or Free Fire Max account on Garena servers
- Your smartphone (Android or iOS)
- 5–10 minutes in the free training room
- Patience to tweak and test
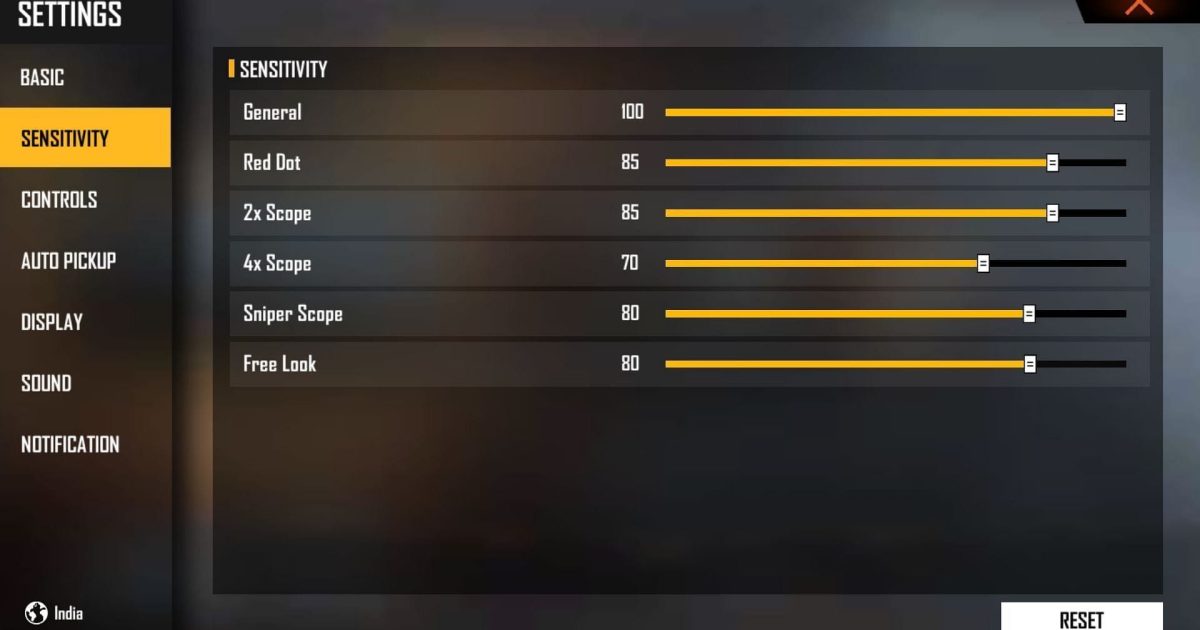
Step 1: Access Sensitivity Settings
Open Free Fire, tap the gear icon on the main lobby to enter Settings, then select the ‘Sensitivity’ tab. You’ll see sliders for General, Red Dot, 2x Scope, 4x Scope, Sniper Scope, and Free Look. Make a note of your current values before changing anything – you can refer to our backup free fire sensitivity settings guide to save them.
Step 2: Set General Sensitivity Baseline
A good starting point for most players on Garena servers is 85 for General sensitivity. If you’re using a high-refresh-rate phone, you can go up to 90-95. For older devices, try 80. This controls your overall camera speed when not scoped. Adjust from here based on your comfort.
Step 3: Set Scope Sensitivities
Now set your scope sensitivities: Red Dot to 70, 2x Scope to 65, 4x Scope to 55, Sniper Scope to 40, and Free Look to 85. These baselines work well for most. For a more tailored approach, check out our guide on best free fire sensitivity settings for pro players or free fire sensitivity settings for sniper style if you prefer sniping.
Step 4: Fine-Tune in the Training Room
Head to the training room and practice aiming at moving bots or still targets. If your crosshair overshoots, lower the sensitivity by 5. If it feels too slow, increase it. Focus on tracking and flick shots for each scope type. This is where you’ll dial in your settings.
Step 5: Test in a Real Match
Jump into a Clash Squad or Classic match and observe your aim. If you’re struggling in close-range, bump up General and Red Dot. For long-range, adjust scopes. Don’t change too much at once – make small tweaks. Our free fire sensitivity settings for fast movement guide can help if you prefer an agile playstyle.
Step 6: Save and Backup Your Settings
Once you’re happy, take a screenshot of your sensitivity page or use the in-game backup feature. This way you can restore if you experiment. Remember, you can always revisit our trusted free fire sensitivity settings guide for alternative baselines.
Common Pitfalls
- Overshooting: Starting with too high sensitivity leads to jittery aim – always start lower and increase gradually.
- Ignoring device differences: What works on an iPhone may not work on an Android – adjust per your phone’s touch response.
- Copying pro settings blindly: Pros have different playstyles and hardware – use pro settings as a reference, not a copy.
Now that you have your baseline, explore other styles. Check out our guides on free fire sensitivity settings for movement control, free fire sensitivity settings for sniper style, and best free fire sensitivity settings for pro players. Keep tweaking and you’ll find your perfect setup!


