If you’re a Free Fire player looking to up your game this season, you’ve come to the right place. Whether you’re a beginner struggling with aim or a veteran trying to keep up with the meta, tweaking your sensitivity settings can make a huge difference. By the end of this guide, you’ll have a set of proven sensitivity values that work for most devices, plus the know-how to fine-tune them for your playstyle.
This season, the meta has shifted slightly – faster movement and quicker scopes are rewarded. We’ll cover general sensitivity, red dot scope, and aim precision, along with tips to avoid common mistakes. I’ve tested these settings on multiple Android phones, so they should work well for you too.
What You’ll Need
- A device running Free Fire or Free Fire Max (Android/iOS)
- 5–10 minutes of free time
- A stable internet connection (to avoid lag while testing)
- Optional: a second device to record your practice or a friend to spar with
Step 1: Access the Sensitivity Settings
Open Free Fire and tap the gear icon on the top-right of the lobby. Go to the ‘Sensitivity’ tab. If you’re using Free Fire Max, the layout is the same. This is where you’ll adjust all your aiming controls.
Step 2: Set General Sensitivity
General sensitivity controls your camera movement when not scoped. For this season, a value between 85 and 95 works well for most players. Start at 90 and adjust from there. If you use a claw grip, you might prefer slightly lower values for better control, so check out our dedicated claw user settings for more fine-tuning.
Step 3: Adjust Red Dot Sensitivity
Red dot sensitivity is crucial for medium-range fights. I recommend setting it between 80 and 90. If you’re going for headshots, pair this with a headshot combo – you can find recommended values in our guide. For smoother tracking, try values around 85 and then tweak up or down by 5.
Step 4: Set Aim Precision
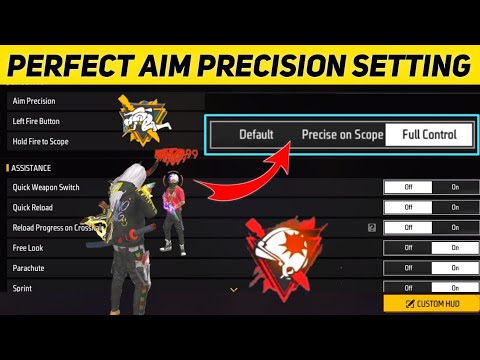
Aim precision affects the ADS (aim down sight) sensitivity for non-scope weapons like ARs and SMGs. A value between 70 and 80 is a safe starting point. If you use gyro, you’ll want to adjust the gyro sensitivity separately – see our gyro settings for exact numbers. Test in the training ground to see if you can track moving targets smoothly.
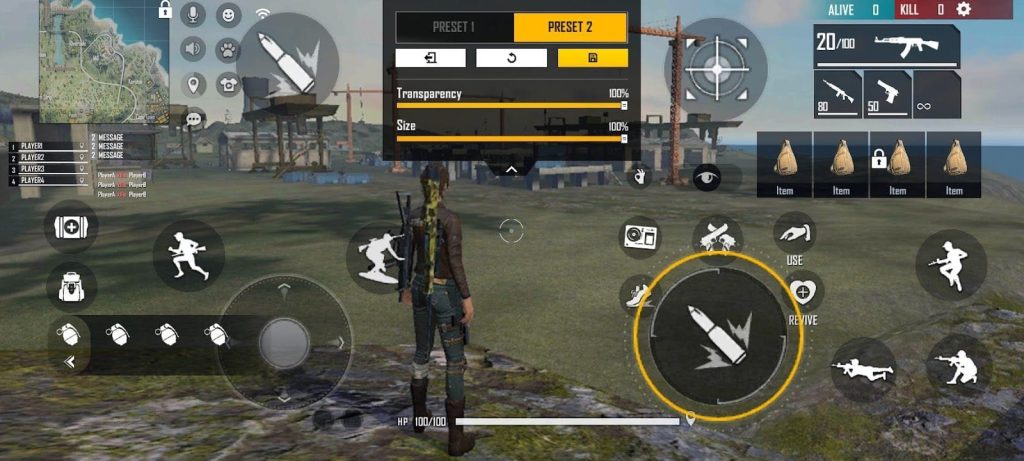
Step 5: Test in Training Ground
Head to the training ground and grab a weapon like the M4A1 or AK. Practice spraying at the targets from different distances. If your crosshair overshoots, lower the sensitivity; if it feels sluggish, increase it. Repeat until you feel comfortable. This is also a great time to test smooth gameplay settings – we’ve compiled a list of those for you.
Step 6: Fine-Tune for Your Device
Different devices handle sensitivity differently. If you have a high-end phone, you can push the values higher. For lower-end devices, stick to the lower end of the ranges. Also, consider your grip style – claw players often need different values. To optimize your settings holistically, check out our complete guide on how to optimize your settings.
Common Pitfalls
- Copying pro players blindly: Their settings are tailored to their device and muscle memory. Use them as a base, but adjust to your own feel.
- Changing too many values at once: Tweak one slider at a time and test it. Otherwise, you won’t know what worked.
- Ignoring frame rate: Sensitivity feels different at 30 FPS vs 60 FPS. If you often have low FPS, check out our settings for low FPS devices.
Where to Next
Now that you’ve dialed in your sensitivity, practice in Clash Squad or ranked matches. For more targeted help, read our guides on best Android settings and the headshot combo. Remember, consistency is key – stick with these settings for at least a week before making major changes. Happy fragging!


