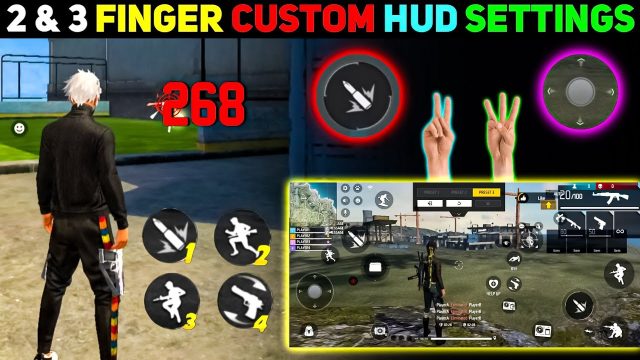
So you’ve decided to take the claw route in Free Fire — using four or more fingers to dominate the battlefield. Claw gives you crazy advantages: you can aim, shoot, jump, and move all at the same time. But without the right sensitivity, all those extra fingers do is make your crosshair fly all over the place. This guide is for claw players who want a smooth, controlled sensitivity that keeps your shots on target without sacrificing mobility. By the end, you’ll have a custom sensitivity profile tuned for claw grip, plus the know-how to tweak it for your own playstyle.
Whether you’re a 3-finger, 4-finger, or even 6-finger claw player, the principles are the same: your sensitivity needs to balance speed with precision. I’ve tested these settings across different phones and screen sizes, and they work great as a starting point. We’ll go step by step, from resetting your current settings to final in-game testing. Let’s get your claw aim laser-sharp.
What You’ll Need
- Free Fire or Free Fire Max installed on your device
- A phone or tablet with a stable internet connection
- At least 10 minutes of uninterrupted time
- A training ground or practice match to test settings
- Optional: a friend to help with movement testing
Step 1: Understand Claw Grip and Why Sensitivity Matters
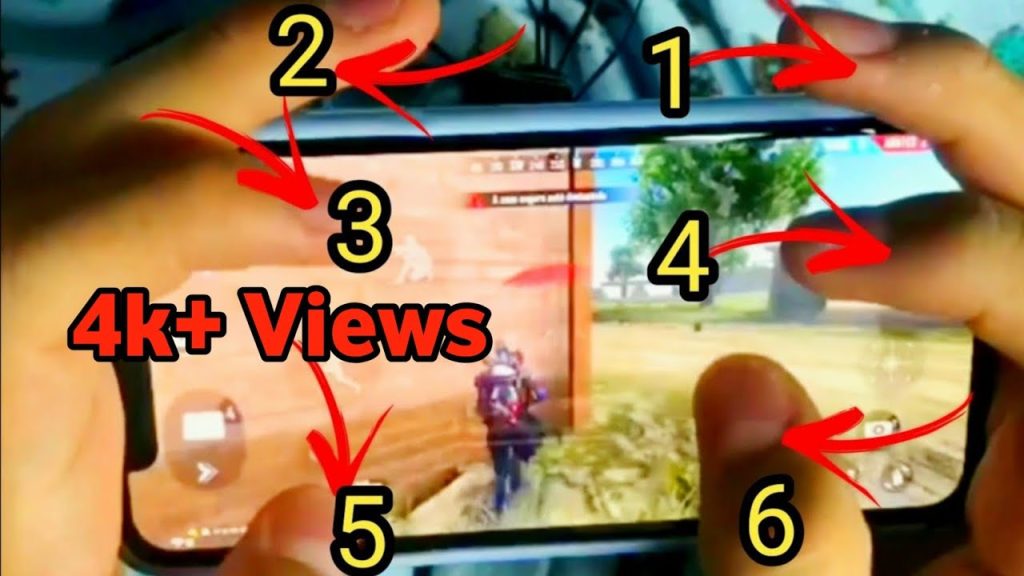
Before messing with numbers, you need to know how claw changes your control. Unlike typical thumb-only play, claw lets you use multiple fingers for separate actions — right thumb aims, right index shoots, left thumb moves, left index crouches or jumps. This means your camera movement can be faster because you have independent finger control. But if your sensitivity is too high, those fast flicks become jerky; too low, and you can’t track moving targets. Start by understanding your current grip and the range of motion your fingers have on the screen.
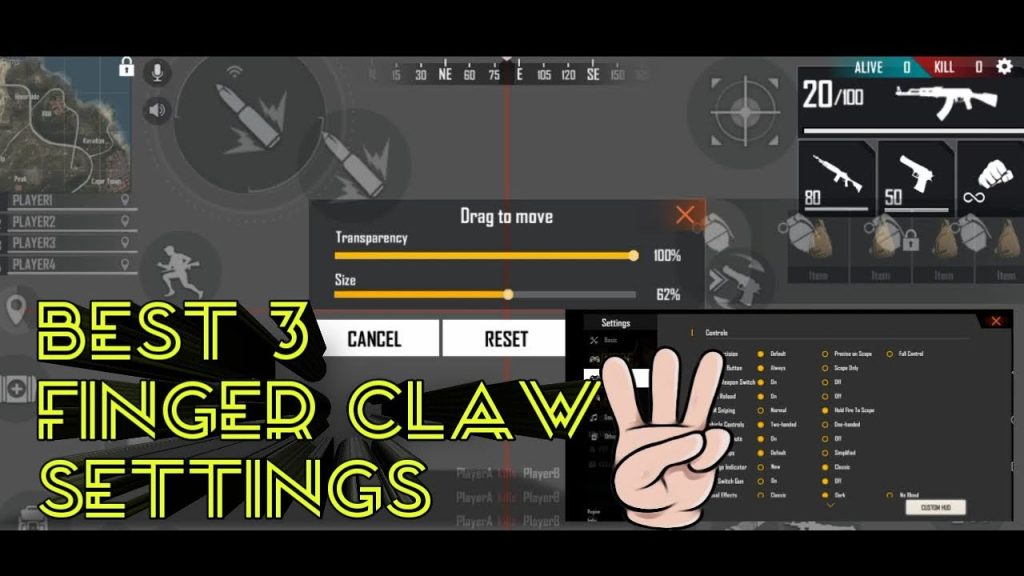
Step 2: Reset to Default Sensitivity
You don’t want old settings interfering. Go to Settings > Sensitivity and tap “Reset” to restore default. This gives you a clean slate. Defaults are usually around 80-90 general sensitivity, but they’re designed for thumbs. As a claw user, you’ll likely want something a bit lower for stability, but it depends on your screen size and finger speed.
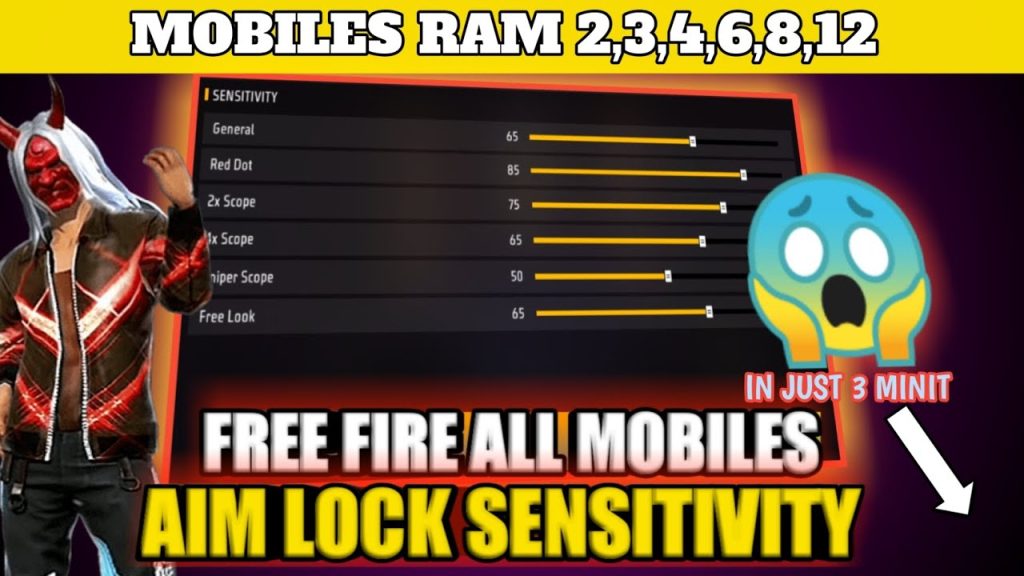
Step 3: Set General Sensitivity (Camera & ADS)
General sensitivity controls your free look and hip-fire camera movement. For claw, I recommend starting at 85-90. This gives you fast enough rotation for close-range encounters without being uncontrollable. For ADS (aiming down sights), set each scope individually. A good baseline: Red Dot: 70, 2x Scope: 55, 4x Scope: 45, Sniper Scope: 30, Free Look: 80. These values work well for most claw players because they allow precise aim while scoped in, but quick flicks when hip-firing.
Step 4: Fine-Tune Sensitivity for Claw Movement
Claw players often use a lower general sensitivity than thumb players because they can physically swipe faster with their index or middle fingers. If you find your crosshair overshooting, drop general sensitivity by 5 points. If you struggle to turn quickly, increase it. Also adjust the sensitivity for different scopes based on your playstyle. For example, if you use a 2x a lot in close combat, you might want it higher (60-65). For sniping, keep it low to avoid sway. A tip: set your movement-focused sensitivity a bit higher for better jiggle peeks and strafing — check out our guide on movement-focused sensitivity for more details.
Step 5: Test in Training Ground
Head to the training ground and practice on moving targets. Start with the static dummies to check if your crosshair stays steady when you aim. Then move to the running bots to see how well you can track. Try different weapons: AR, SMG, and sniper. If you miss too many shots, lower your ADS sensitivity. If you can’t keep up with fast-moving targets, raise it slightly. Also test your free look sensitivity for checking surroundings while running — it should be high enough to look behind you quickly.
Step 6: Save and Practice in Real Matches
Once you’re comfortable in training, apply your settings and jump into a few classic or ranked matches. Don’t change anything mid-game; play at least 3-5 matches to get a feel. Pay attention to your drag shots, spray control, and sniper flicks. If you feel something’s off, note it and adjust after the match. Remember, muscle memory takes time — stick with a setting for a few days before making big changes.

Common Pitfalls
- Copying pro player sensitivities blindly: Pro players have different finger sizes, screen protectors, and personal preferences. Their settings may not work for you. Use them as a starting point, but always adjust. Check out our collection of pro player sensitivities for inspiration.
- Changing too many settings at once: It’s tempting to tweak everything after one bad game. Instead, change one sensitivity at a time and test it thoroughly. Otherwise, you won’t know which adjustment helped or hurt.
- Ignoring your HUD layout: Sensitivity is only half the equation. If your claw layout is uncomfortable, your aim will suffer. Make sure your button placements allow each finger to reach naturally. A good HUD can make even moderate sensitivity feel crisp.
Where to Next
You’ve got your base sensitivity dialed in. Now it’s time to refine it further. Check out our guide on sensitivity for better tracking to improve your mid-range consistency. If you’re curious about other control styles, see how your sensitivity compares to 2 finger setups. And once you feel locked in, learn how to adjust sensitivity for different scenarios — there’s always room to fine-tune.