So you’re playing Free Fire with just two thumbs? No shame — many pros started there. The key is having sensitivity settings that let you aim fast while keeping control. This guide is for anyone who uses a 2 finger setup (no claw, no gyro) and wants to hit more headshots, track enemies smoothly, and improve their movement. By the end, you’ll have a solid sensitivity baseline you can tweak for your own phone, plus tips to avoid common mistakes.
We’ll go step by step through the main sensitivity sliders, explain what each one does, and show you how to test your settings in the training ground. Whether you’re a beginner or an intermediate player, these settings will give you a huge advantage. Let’s get your aim on point.
What You’ll Need
- A phone running Free Fire (or Free Fire Max) – any brand is fine.
- At least 10 minutes of free time to set up and test.
- Access to the Training Ground (from the main menu, tap Training > Training Ground).
- A notepad or screenshot tool to save your settings (or use the in-game backup).
- Patience – you might need to tweak a few times.
Step 1: Open the Sensitivity Settings
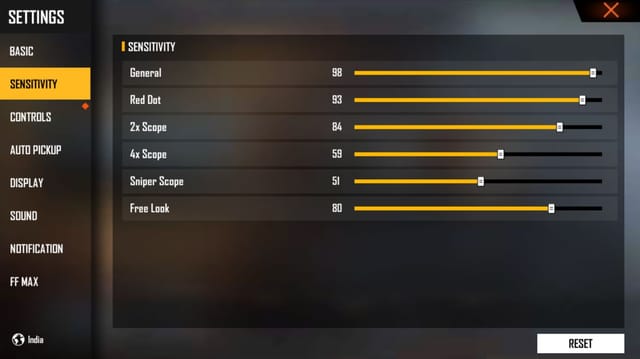
Launch Free Fire and go to the main lobby. Tap the gear icon (Settings) at the top right. Then tap the ‘Sensitivity’ tab. Here you’ll see a long list of sliders. Don’t panic – we only care about the ones that matter for a 2 finger setup. The rest can stay at default.
If you haven’t already, take a screenshot of your current settings so you can revert if needed. You can also use the ‘Share’ button to save your configurations – check out our guide on how to save free fire sensitivity settings to keep a backup.
Step 2: Set General Sensitivity
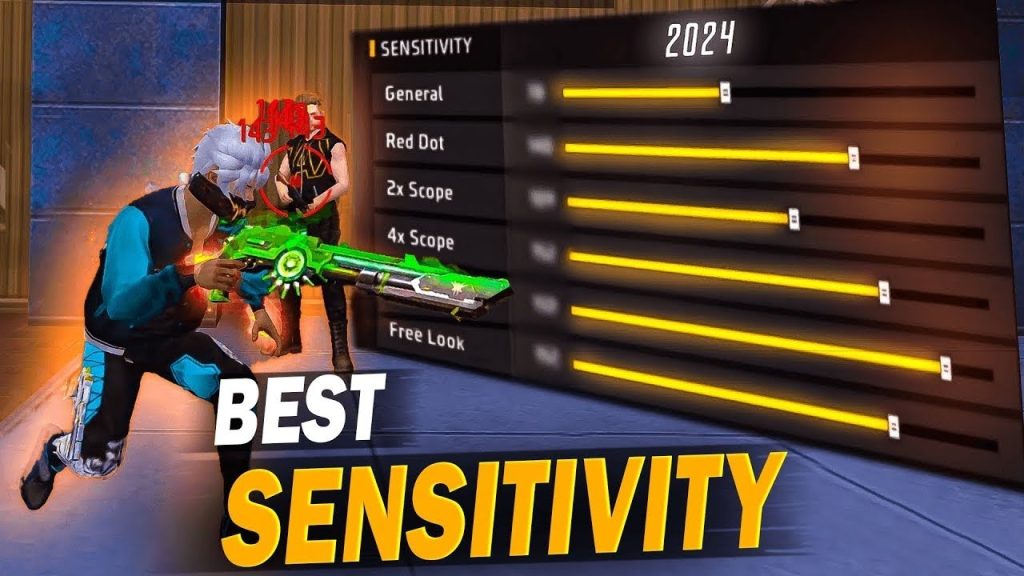
The ‘General’ sensitivity controls your overall look speed outside of scopes. For a 2 finger player, you want this high enough to turn quickly but not so high that you overshoot. Start with a value between 85 and 95. I personally use 90. This lets you flick to enemies without lifting your thumb.
Remember: 2 finger players rely on fast swipes because you can’t use extra fingers to adjust. A higher general sensitivity means you need less thumb movement. Tap the slider and drag it to 90, then exit the settings to save (it auto-saves on most devices).
Step 3: Adjust Red Dot and 2x Scope
These are your most used scopes in close to medium range. Set ‘Red Dot’ to 90 and ‘2x Scope’ to 85. This gives you a snappy aim for close fights while keeping a bit more control for medium range. If you’re using a device with a 120Hz screen, you might want to go slightly lower – check the free fire sensitivity settings for 120hz screen article for specifics.
Test this in the Training Ground: aim at a static target and strafe left-right. Your crosshair should stay on target without overcorrecting. If it’s too jittery, drop by 5 points.
Step 4: Fine-Tune 4x and Sniper Scope
For longer ranges, you need lower sensitivity. Set ‘4x Scope’ to 70 and ‘Sniper Scope’ (the one for AWM, Kar98k, etc.) to 50. This prevents your aim from bouncing around when you’re trying to land that headshot. If you main snipers, you might want even lower – check our free fire sniper scope sensitivity settings for detailed values.
Another tip: Use the ‘Sniper Scope’ sensitivity also for the 6x scope (if you use one). Many 2 finger players avoid high zoom scopes because they require more precise thumb control. Stick to 4x max if you’re still learning.
Step 5: Practice in the Training Ground
Now it’s time to test. Go to Training Ground and pick up a variety of weapons. Practice moving and shooting at the moving targets. Pay attention to how smoothly you can track a target while moving left-right. If you feel dizzy, your sensitivity might be too high. If you can’t turn fast enough when someone shoots you from behind, increase general sensitivity.
I recommend spending at least 10 minutes here. Try to hit 10 consecutive headshots on the moving target at 50 meters. If you struggle, tweak the corresponding scope sensitivity. For more exercises, read the tested free fire sensitivity settings guide for advanced drills.
Step 6: Test in a Real Battle
Once you’re confident, jump into a ranked match (Classic or Clash Squad). Focus on your aim and movement. Don’t change settings during the match – finish the game and note how it felt. Did you miss easy shots? Were you able to react to close-range enemies? Adjust one slider at a time.
Remember that different phones have different touch response. If you have a Samsung device, refer to the best free fire sensitivity settings for samsung recommended values. For high-end devices with 12GB RAM, the free fire max sensitivity settings 2026 can be used as a starting point.
Common Pitfalls
- Setting sensitivity too high: You’ll overshoot and miss easy kills. With 2 fingers, your thumb movement is limited – high sens can make you spin wildly. Always start lower and increase gradually.
- Forgetting to save or backup: Free resets your settings after some updates or if you clear cache. Use the in-game ‘Share’ feature or screenshot your values. See how to save free fire sensitivity settings for a full backup method.
- Not adjusting for your phone screen size: What works on a 6.5-inch screen may be too slow on a 6.1-inch one. Always test and tweak. Also, consider your screen’s refresh rate (60Hz vs 120Hz).
Where to Next
Congratulations, you now have a solid 2 finger sensitivity setup! But don’t stop here. Try experimenting with the free fire sensitivity settings for pro players to see how the top players tweak theirs. You can also learn how to share free fire sensitivity settings with friends so you can compare. And if you ever want to switch to 3 or 4 finger claw, come back for more guides. Happy gaming!