Hey there, Free Fire player! If you’re struggling to land your shots or feeling like your crosshair is all over the place, you’ve come to the right place. This guide is for both mobile and emulator players who want to dial in their sensitivity settings – with a special focus on pointer speed. By the end of this tutorial, you’ll have a custom sensitivity profile that matches your playstyle and a pointer speed that gives you pixel-perfect aim. No more frustration, just clean kills.
We’ll walk through each setting step by step, from the in-game sensitivity sliders to the system-level pointer speed adjustments. Whether you’re a thumb player on a phone or a mouse user on an emulator like BlueStacks or Gameloop, these tweaks will help you react faster and stay on target. Ready? Let’s get started.
What You’ll Need
- Free Fire or Free Fire Max installed on your device or emulator
- At least 15 minutes of uninterrupted time (training mode is your friend)
- A friend to 1v1 with (optional but helpful for testing)
- Patience – finding your perfect settings takes a few rounds
Step 1: Open Free Fire Settings
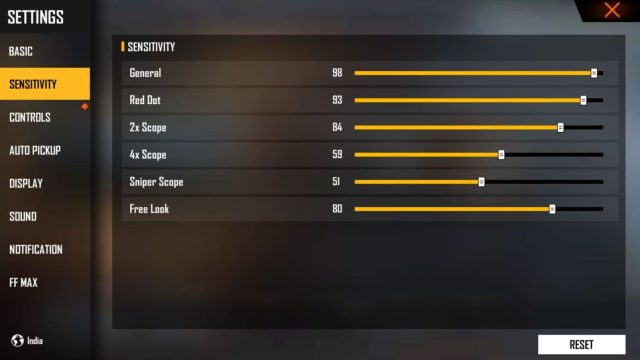
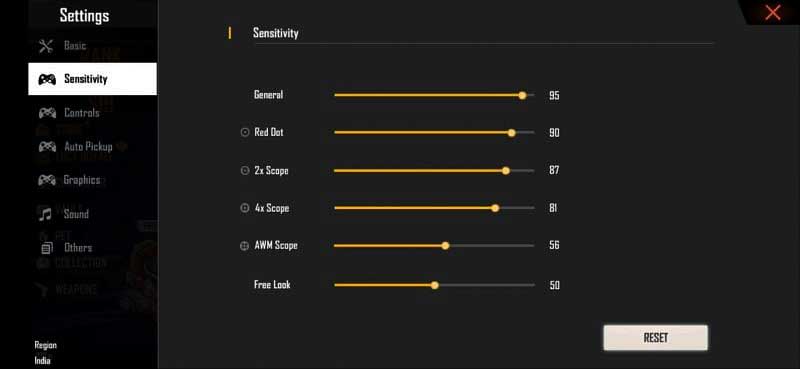
Launch Free Fire and tap the gear icon on the main lobby screen. Navigate to the ‘Sensitivity’ tab. You’ll see sliders for General, Red Dot, 2x Scope, 4x Scope, Sniper Scope, and Free Look. Take a screenshot of your current settings in case you want to revert.
Step 2: Adjust General Sensitivity
General sensitivity controls your hip-fire aim and overall turning speed. Start by setting it to 85. If you’re an emulator user, lower it a bit (around 70) because mouse movements are more precise. Jump into training mode and do a full 360 spin – it should take about 2 seconds. If it’s too fast or too slow, adjust by 5 until it feels natural. Many pro players use values between 80 and 100, but you can check out tested free fire sensitivity settings for more reference points.
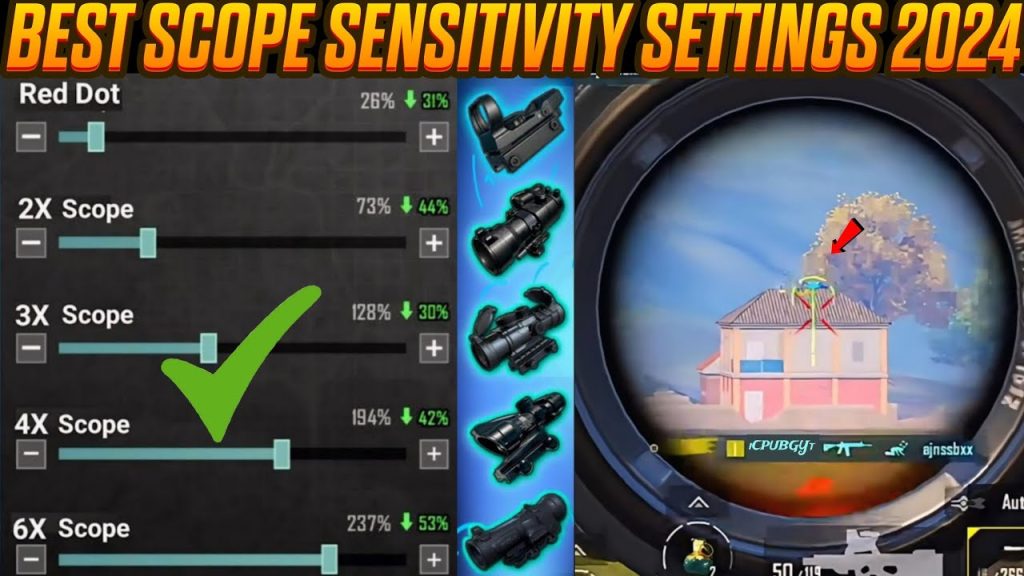
Step 3: Adjust Scope Sensitivity
Scope sensitivity matters for mid-to-long range fights. A good starting point is: Red Dot – 70, 2x Scope – 55, 4x Scope – 40, Sniper Scope – 30. These lower values prevent you from overshooting targets when zoomed in. Practice flicking onto a training dummy at 50 meters. If you consistently overshoot, reduce the scope sensitivity by 5. For a deep dive into scope tweaks, see the custom free fire sensitivity settings guide.
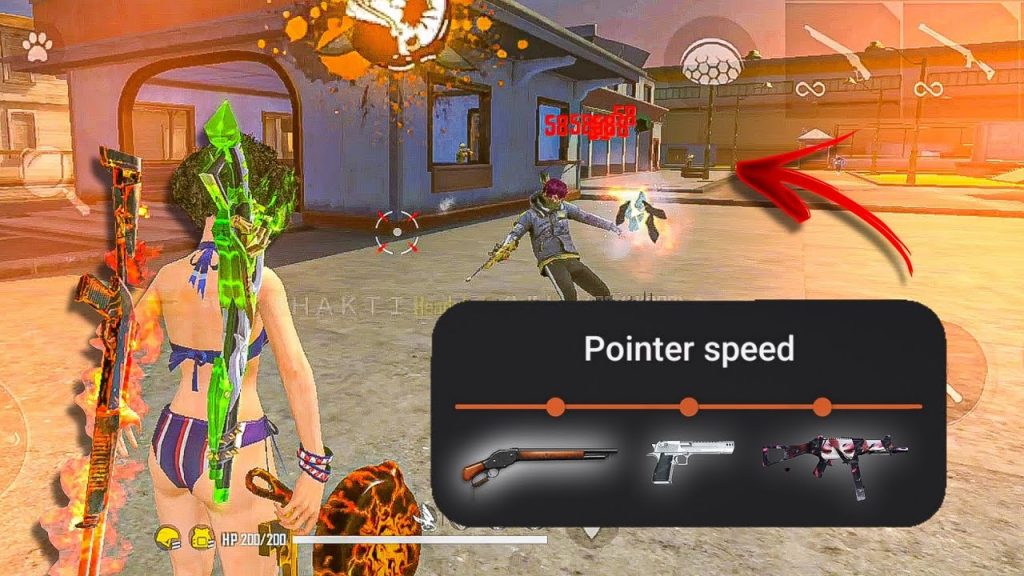
Step 4: Adjust Pointer Speed (Emulator & PC)
Pointer speed is a system-level setting that affects how fast your mouse moves across the screen. On Windows, go to Settings > Devices > Mouse and adjust the pointer speed slider. Free Fire players aiming for precision often set it between 6 (medium) and 10 (fast). Then, in your emulator’s settings (BlueStacks or Gameloop), ensure mouse sensitivity is not overriding the system. For high-DPI mice, you’ll need to match DPI with pointer speed – check out free fire sensitivity settings over 1000 dpi if you’re using a gaming mouse. Test by quickly moving your crosshair from one side of the screen to the other – it should not skip pixels or feel sluggish.
Step 5: Fine-Tune with Free Look
Free Look sensitivity controls how fast your camera moves while running. Keep it between 70 and 90 so you can scan without disorienting yourself. Practice circling an obstacle in training mode while keeping your crosshair centered. If you feel dizzy, lower it. For more pro-level setups, the free fire max sensitivity settings for pro players can give you extra pointers.
Step 6: Test in Real Matches
Now take your settings into a classic match. Focus on close-range battles first – if you’re losing fights you think you should win, don’t panic. Stick with the settings for at least five games. Your muscle memory takes time to adapt. Try the free fire sensitivity settings for precision aim if you still feel shaky. And remember, small tweaks (like ±5) make a big difference.
Common Pitfalls
- Setting sensitivity too high: You’ll overshoot and lose control. Start lower than you think and work up.
- Ignoring pointer speed consistency: If your mouse DPI changes or Windows pointer speed is different, your in-game feel will drift. Lock your pointer speed before tweaking sensitivity.
- Not testing enough: One training session isn’t enough. Play several matches before deciding if a setting works.
Where to Next
You’ve got your sensitivity and pointer speed dialed in – nice work! To keep improving, check out our free fire sensitivity settings youtube channel for visual walkthroughs, or read about specific setups like the best settings for Tecno or Vivo phones. The key is consistency: stick with these settings and you’ll notice your aim getting cleaner every week. Good luck out there!