
If you’re rocking a high DPI mouse on PC or a phone with a high touch sampling rate, you’ve probably noticed how tiny movements can make your crosshair fly across the screen. That’s not a bug — it’s a sign that your Free Fire sensitivity needs a tune-up. This guide is for anyone using high DPI settings (like 1600 DPI on a gaming mouse or a phone with 240Hz touch sampling) who wants to control their aim like a pro. By the end, you’ll have a sensitivity setup that turns those twitchy flicks into laser beams.
High DPI means higher input resolution, which is great for precision — but only if your in-game sensitivity is dialed down to match. We’ll walk you through the math, the best starting values, and how to fine‑tune in the training ground. No guesswork, just practical steps that work for PC and mobile players alike.
What You’ll Need
- Free Fire installed on your device (PC or mobile).
- A high DPI mouse (PC) or a phone with high touch sampling rate (mobile).
- Access to the training ground in Free Fire.
- Patience to test and adjust — perfect aim doesn’t happen in one game.
Step 1: Understand the DPI–Sensitivity Relationship
DPI (dots per inch) measures how many pixels your cursor moves per inch of physical movement. In Free Fire, the in-game sensitivity multiplies that movement. So a high DPI + high sensitivity = out of control. The goal is to find a balance where you can aim smoothly without overshooting.
For PC players, a common baseline is 400 or 800 DPI, but if you’re using 1600 DPI (common on modern gaming mice), you’ll need to cut your in-game sensitivity roughly in half compared to what you’d use at 800 DPI. On mobile, ‘high DPI’ often refers to high touch sampling rate (e.g., 240Hz) – this doesn’t change the sensitivity numbers directly, but it does make every touch more responsive, so you may want slightly lower sensitivity for better control.
Step 2: Set Your DPI on PC or Adjust Touch Sampling on Mobile
Before jumping into Free Fire, set your hardware to its intended DPI. On PC, use your mouse software (Logitech G Hub, Razer Synapse, etc.) or a dedicated DPI button on the mouse. If you’re on mobile, go to phone settings → Developer options and look for ‘Touch sampling rate’ or ‘Pointer speed’ – set it to the maximum available. This ensures your device is ready for the tweaks ahead.
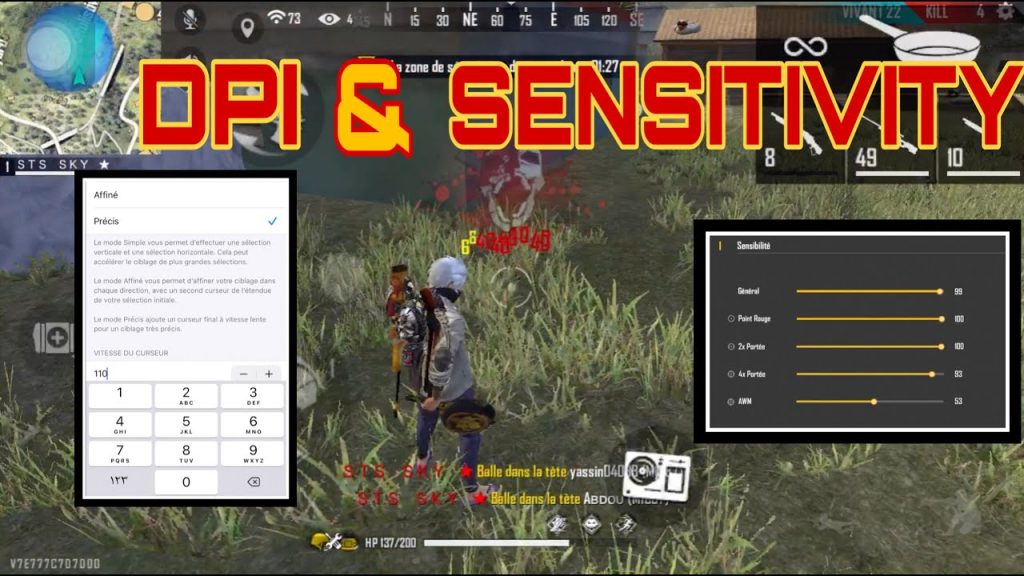
Don’t worry if your phone doesn’t have developer options; most gaming phones already run at high touch sampling by default. If you’re unsure, check the phone’s specs online.
Step 3: Recommended Sensitivity Values for High DPI
A higher DPI lets you see more detail, but you have to dial down the in-game sensitivity to keep your aim steady.
Pro Free Fire player
Here are starting points based on 1600 DPI (PC) or high touch sampling (mobile). Adjust as needed.
- General Sensitivity: 60–70 (PC) / 75–85 (mobile)
- Red Dot & Holo Scope: 50–60 (PC) / 65–75 (mobile)
- 2x Scope: 40–50 (PC) / 55–65 (mobile)
- 4x Scope: 30–40 (PC) / 45–55 (mobile)
- Sniper Scope: 20–30 (PC) / 35–45 (mobile)
- Free Look: 50–60 (PC) / 70–80 (mobile)
Start with these, then head to the training ground to test. If you’re over‑flicking, lower the values; if you feel sluggish, bump them up a little.
Step 4: Fine‑Tune in the Training Ground
Enter the training ground in Free Fire. Choose a weapon you use often (like the M4 or AK). Equip a red dot sight and practice tracking moving targets. Move your crosshair to specific points and try to hold it steady. If you see jitter or overshoot, reduce the sensitivity for that scope. If you can’t keep up, increase it. Repeat with different weapons and scopes.
Take notes of the values that feel best. You can also use the ‘custom’ sensitivity mode to set separate values for each scope. Don’t forget to also adjust the ‘fire button’ and ‘scope’ sensitivity if you’re on mobile – those can make a huge difference in close quarters.
Step 5: Test in Real Matches
Once you’re comfortable in the training ground, play a few Clash Squad or Classic matches. Pay attention to how your aim feels in real combat – flicks, tracking, and spray control. If something feels off, go back and tweak. It might take a few rounds to get used to the new settings, so don’t change too much at once.
Remember: consistency is key. Stick with one set of values for at least a day before making big changes. Your muscle memory needs time to adapt.
Common Pitfalls
- Too high sensitivity – Jittery aim and missed shots. Always start lower than you think you need.
- Ignoring DPI scaling – The same sensitivity value feels different at 800 vs 1600 DPI. Always adjust relative to your DPI.
- Skipping the training ground – Real matches are not the place to experiment. Do your tweaking in training first.
Where to Next
Now that your high DPI setup is optimized, check out our DPI and sensitivity settings guide for a deeper dive into the math. If you’re on mobile, our thumb player settings might help with grip and touch control. For a one‑size‑fits‑all approach, try our best sensitivity settings or the balanced DPI settings. And if you want to go pro, look at the professional sensitivity settings from top players. Happy hunting!



