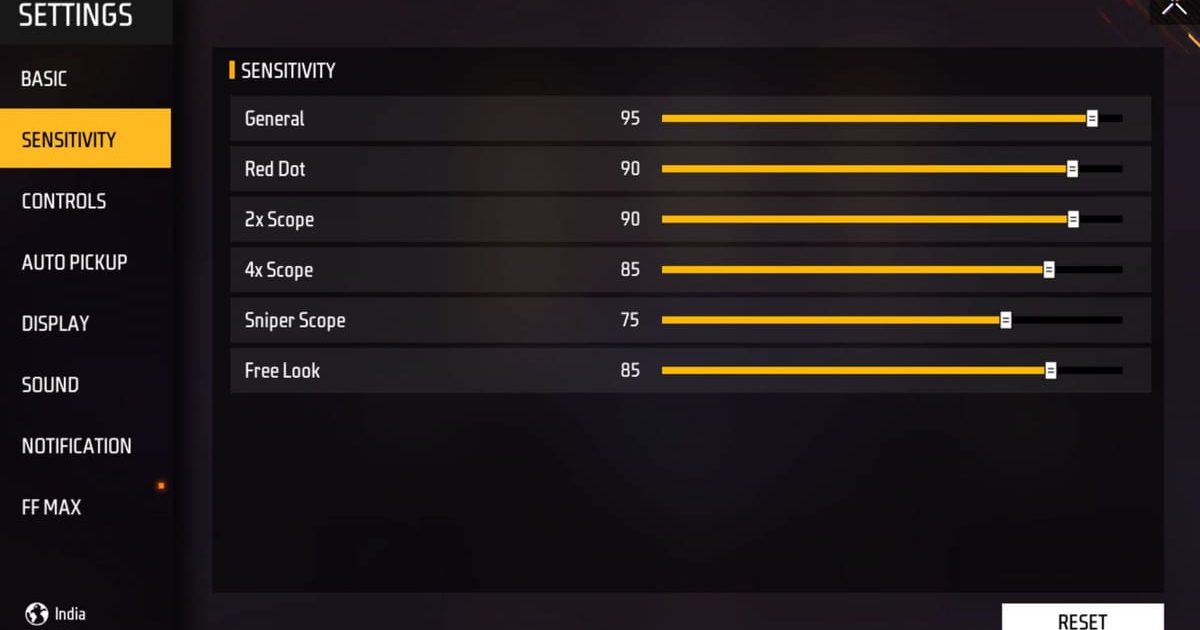
You know that feeling when you line up a shot, flick your crosshair, and nail the enemy before they even react? That’s the magic of a perfect flick shot. But getting there requires the right sensitivity settings—too high and you overshoot, too low and you’re slow. This guide is for anyone who wants to improve their snap aim, whether you’re a casual player or grinding ranked. By the end, you’ll have a custom sensitivity setup and a practice routine to make those flicks second nature.
We’ll walk through choosing your DPI, adjusting general and scope sensitivities, and fine-tuning based on your favorite weapons. I’ll also share some common mistakes to avoid. If you’re completely new to tweaking settings, check out our simple baseline settings first to get a solid foundation. Ready? Let’s dive in.
What You’ll Need
- A device running Free Fire (Android or iOS)
- Access to the in-game settings menu (gear icon)
- At least 10 minutes in the Training Ground for testing
- A friend or a training dummy to practice flick patterns
- Optional: a claw combo or four-finger HUD setup for better control
Step 1: Understand the Basics of Flick Shots

A flick shot is a quick, subconscious movement where you snap your crosshair to an enemy’s position. It relies on muscle memory and consistent sensitivity. Pro players often use a sensitivity that lets them do a 180-degree turn with a comfortable swipe—usually around 20–30 cm per 360. For mobile, that translates to a DPI (dots per inch) setting between 300 and 800, with in-game sensitivity tuned afterwards. If you’ve never measured your DPI, your phone’s default is likely around 400–600. Start there.
Step 2: Set Your DPI and General Sensitivity

Go to Settings > Sensitivity. Set your Camera Sensitivity (third-person) to around 90–100 for fast turning. For the Red Dot and 2x scope, start at 80–85. The key is to keep your general sensitivity high enough to flick quickly but not so high that you lose control. A good test: spam the Training Ground and try to snap between two targets rapidly. If you overshoot, lower it by 5 points. If you feel sluggish, bump it up. For more precision, check out our fast turning settings for close-quarters dominance.
Step 3: Fine-Tune Your Red Dot and Scope Sensitivity

Flick shots often happen with ARs or SMGs at medium range. Your Red Dot sensitivity is crucial. I recommend starting at 80 and adjusting. For scopes (2x, 4x), lower values (60–70) give better control. Use the Training Ground’s moving targets to practice flicks with each scope. If you use the M1887 for close-range flicks, our M1887 settings are a great reference. Remember, scope sensitivity should feel natural when you snap—if you have to correct, you’re not there yet.
Step 4: Practice Flick Drills in the Training Ground
Head to the Training Ground and pick a weapon you main. Stand at a distance from the stationary bots. Practice snapping from one bot to another without aiming down sights first. Then, add ADS flicks. Do 10 reps per angle. Then move to moving targets. The goal is to build muscle memory. Many esports players spend 30 minutes daily on drills like this. It’s boring but effective. If you’re using a claw combo, you’ll have more fingers for simultaneous movement and aim, which helps flicks.
Step 5: Adjust Based on Your Weapon Choice

Different weapons need different sensitivities. For shotguns like the M1887, you want a bit higher sensitivity to track fast-moving enemies. For sniper rifles, lower sensitivity for precise drag shots. Experiment with each weapon class. If you play on a high FPS device, you can afford higher sensitivity because the frames are smoother. Our high FPS settings can help you calibrate. Remember, no one-size-fits-all—tweak until it feels like an extension of your hand.
Common Pitfalls
- Sensitivity too high: You’ll overshoot every time. If you can’t land a flick without correcting, lower it by 5–10 points and practice again.
- Sensitivity too low: You’ll run out of screen real estate. If you can’t do a 180-degree flick in one swipe, increase slowly.
- Ignoring DPI: Many players only adjust in-game sensitivity without checking device DPI. Use a DPI calculator or your phone’s pointer speed (if available) to get consistent results.
Where to Next
Now you’ve got a flick-ready sensitivity setup. But don’t stop here—consistency comes from practice. Check out our guides on claw combo for better control, or explore esports players’ settings for inspiration. Also, remember to export your sensitivity code once you’re happy so you never lose it. Keep grinding, and those flicks will become automatic.



