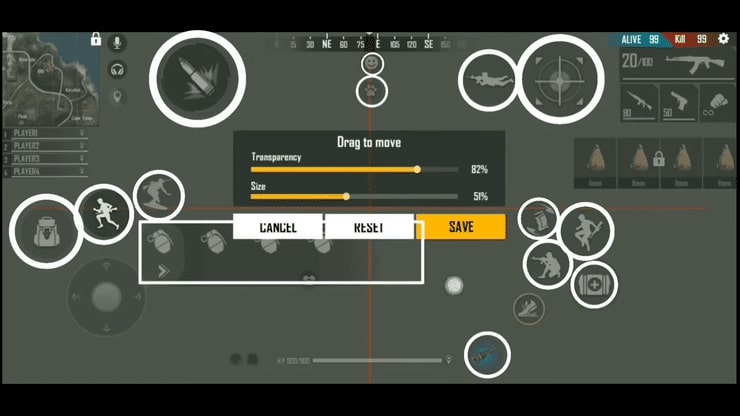
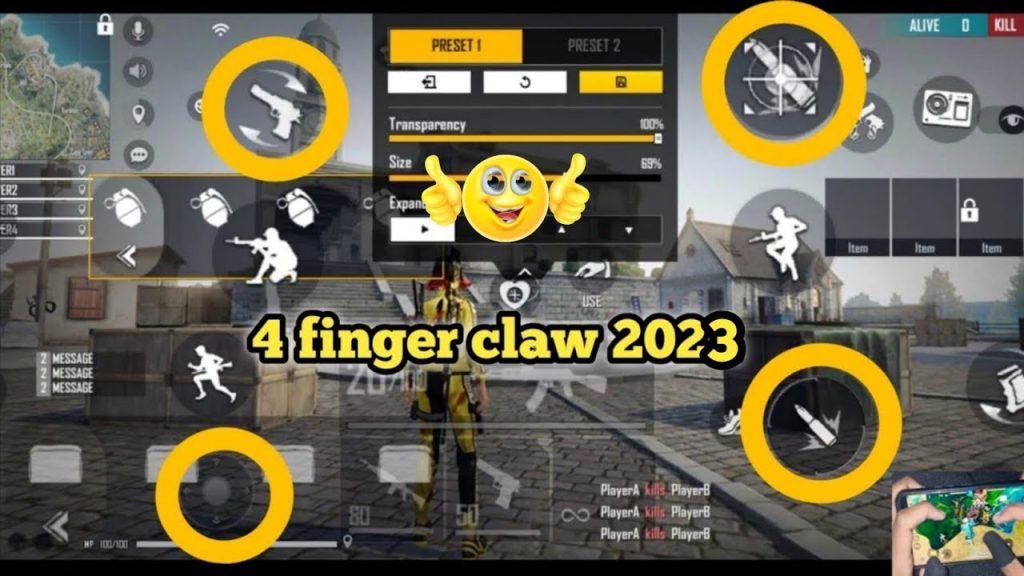
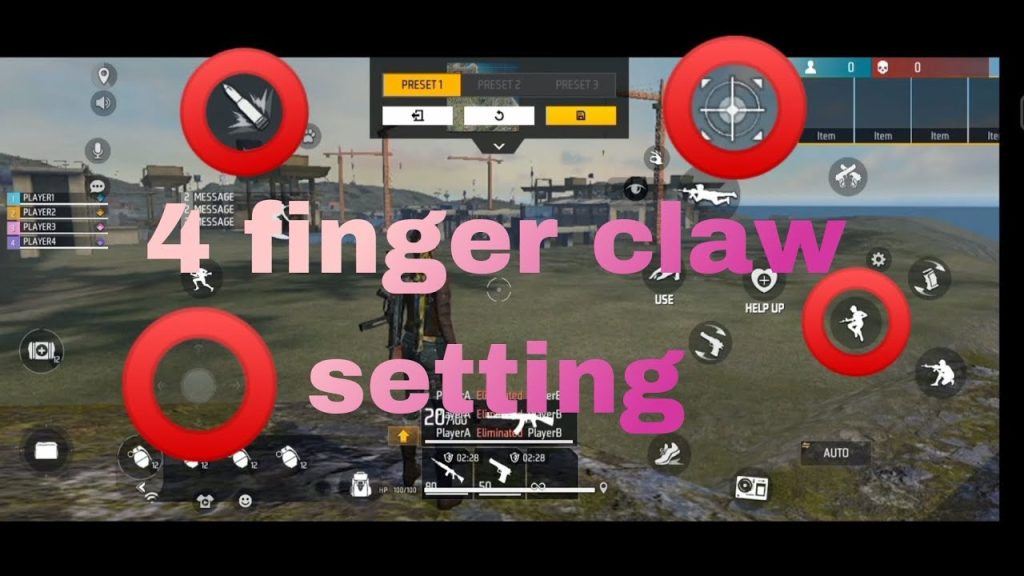
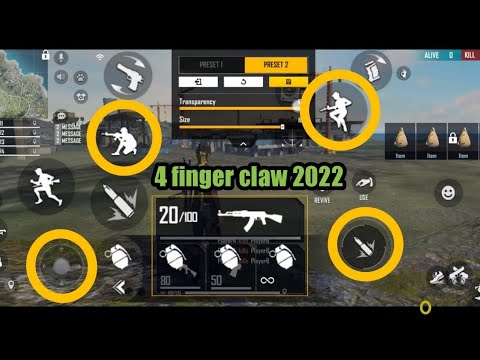
If you’ve switched to a 4 finger claw setup in Free Fire, you already know it gives you a huge advantage—faster aiming, better movement, and the ability to fire while gloo-walling. But all that potential goes to waste if your sensitivity is off. This guide is for players who are already using (or planning to use) 4 fingers and want a sensitivity setup that matches your aggressive playstyle. By the end, you’ll have a solid base sensitivity that works in ranked matches and scrims.
We’ll cover everything from general sensitivity to scope preferences, and we’ll link to related guides like drag headshot sensitivity and one tap sensitivity so you can fine-tune further. No fluff—just numbers and logic that have been tested on real devices.
What You’ll Need
- Free Fire installed and updated (preferably on a device with 90+ Hz refresh rate).
- A 4 finger claw HUD layout—you can find plenty of templates online or create your own.
- At least 30 minutes of uninterrupted practice time in training mode or classic matches.
- Patience to tweak numbers. No sensitivity is one-size-fits-all.
Step 1: Set Your General Sensitivity
General sensitivity controls your hip‑fire aim and movement while looting. With 4 fingers, you want it high enough to do quick 180° turns but not so high that you overshoot. Start with these values: Camera sensitivity: 90, ADS sensitivity: 85, Gyroscope (if you use it): 60. Test in training mode—if you flick past targets, lower by 2–3 points until you hit consistently.
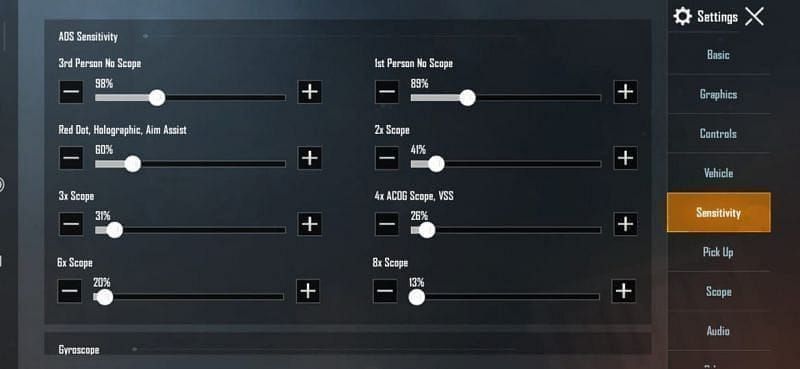
Step 2: Adjust Red Dot and Scope Sensitivity
For close-range guns like the MP40 or M1014, your red dot sensitivity should match your general ADS. For medium to long range (2x, 4x, and thermal scopes), reduce by 10–15 points to avoid jittery aim. A good starting point: Red dot: same as ADS, 2x scope: 70, 4x scope: 50, Sniper scope: 30, Thermal: 50. These numbers work well for the 4 finger claw because you have better control with your extra fingers.
Step 3: Fine-Tune with Practice
Take your settings into a classic match. Focus on one fight at a time—don’t change numbers after every death. Play five full matches, then adjust. If you’re missing gloo wall shots, lower your general sensitivity by 5. If you’re slow to react, increase it by 3. Also check out streamer-tested settings for a reference, but remember those are tailored to their hands and devices.
Step 4: Save Your Sensitivity Settings
Once you’re happy, don’t lose them. Use the in‑game backup feature or take screenshots. For a full guide on how to backup and restore, read our post on how to save your sensitivity settings. This way, if you switch devices or accidentally reset, you can get back to your perfect setup in seconds.
Common Pitfalls
- Copying settings from someone else without testing. Even if that player uses 4 fingers, their device touch latency and hand size are different. Always start from a base and tweak.
- Ignoring your DPI or touch acceleration settings on your phone. High DPI + high sensitivity = uncontrollable aim. Keep DPI around 400–600 if your phone allows it.
- Forgetting to adjust for your finger size. Thicker fingers may need a lower sensitivity because accidental taps cover more screen. Try lowering by 10 across the board if you keep hitting the wrong buttons.
Where to Next
Now that you have a solid sensitivity base, go practice in the training range. For more advanced techniques, check out our guides on elite gameplay settings and red numbers headshots. Remember, sensitivity is personal—tweak it until it feels like an extension of your fingers. Happy headshots!
