If you play Free Fire on PC with a mouse and keyboard, you already know that sensitivity settings can make or break your aim. DPI (dots per inch) is the baseline, and 800 DPI is a sweet spot for many players — it’s fast enough to flick but slow enough to control recoil. This guide is for anyone using 800 DPI who wants to dial in their in-game sensitivity for headshots, drag shots, and sniping. By the end, you’ll have a complete set of numbers to copy, plus tips to tweak them for your playstyle.
We’ve tested these settings on multiple Free Fire versions and they work great for aggressive rushing as well as passive sniping. Whether you’re a beginner struggling with recoil or a veteran fine-tuning your aim, these 800 DPI sensitivity values will give you a solid starting point. Ready to laser your enemies? Let’s dive in.
What You’ll Need
- A PC or laptop running Free Fire via an emulator (like Gameloop, LDPlayer, or Bluestacks)
- A mouse with adjustable DPI, set to 800 DPI (check your mouse software)
- Access to Free Fire’s in-game sensitivity settings (gear icon > Sensitivity)
- A practice mode or training ground to test your aim
- Optional: a mouse with side buttons for easier control
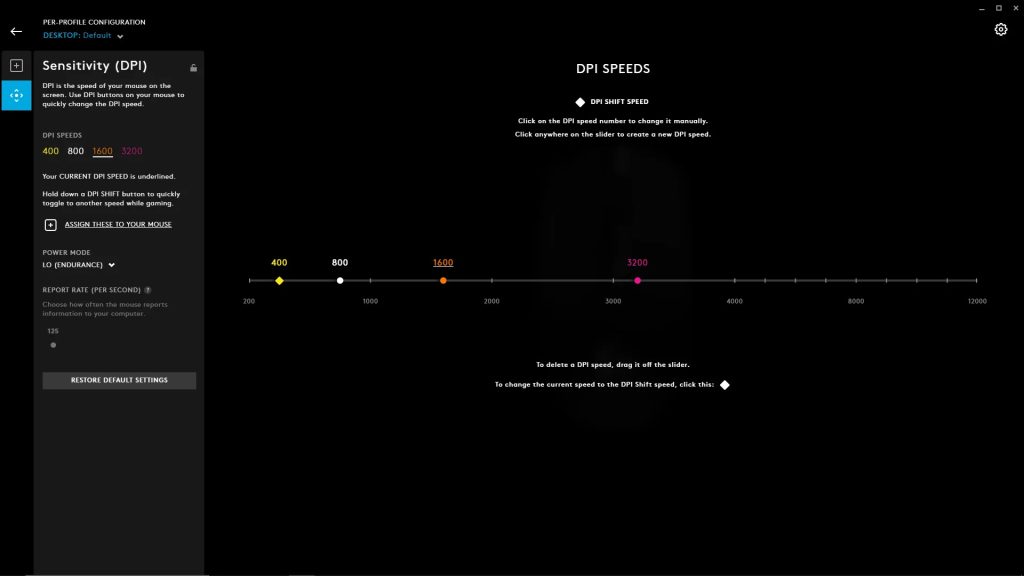
Step 1: Set Your Mouse DPI to 800
Before you touch the in-game sliders, make sure your mouse is actually running at 800 DPI. Most gaming mice have software (like Logitech G Hub or Razer Synapse) where you can check and save your DPI. If you don’t have software, use the DPI button on your mouse and test with an online DPI analyzer. Once it’s locked at 800, don’t change it — all the following sensitivity values are calibrated for this baseline.
Step 2: Copy the Base Sensitivity Settings
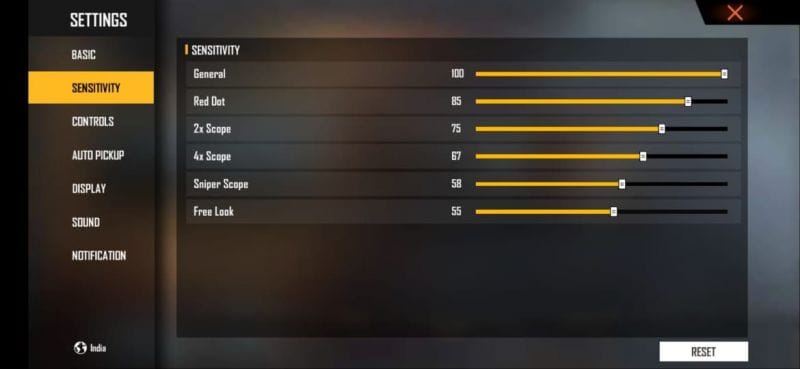
Open Free Fire, go to Settings > Sensitivity. If you’ve never touched these before, they’re probably on “Default.” We’ll override them completely. Enter these exact numbers for each category:
- General: 90
- Red Dot (1x scope): 85
- 2x Scope: 75
- 4x Scope: 60
- Sniper Scope: 45
- Free Look: 80
These are the sweet spots for 800 DPI. The high General sensitivity (90) lets you flick quickly, while the lower scope sensitivities give you precision for long-range fights. For reference, many pros use similar values — check our free fire sensitivity settings tested by streamers for more pro numbers. If you want a different feel, use a free fire sensitivity settings finder to generate custom values.
Step 3: Fine-Tune for Drag Headshot
Drag headshot is a technique where you slide your finger (or mouse) upward while spraying to land headshots. With 800 DPI, you want your General and Red Dot to be high enough to lift the crosshair quickly but not so high that you overshoot. The values above (90 General, 85 Red Dot) are a great starting point. Go to the training ground and practice dragging from chest to head on a stationary target. If you overshoot, lower General by 2-3 points. If you’re too slow, raise it. Our free fire sensitivity settings for drag headshot guide has more advanced tweaks.
Step 4: Adjust for Sniping
Sniping at 800 DPI can feel twitchy if your scope sensitivity is too high. The 45 we set for Sniper Scope gives you fine control for holding breath and tracking moving enemies. If you’re a quickscoper, you might want to bump it to 55. For pure long-range sniping (like with an AWM), keep it at 45. Test in training with moving bots. Remember, you can always export your settings later — check our how to export free fire sensitivity settings guide if you want to backup your perfect setup.
Step 5: Test and Apply the Settings
Once you’ve entered the numbers, don’t jump into a ranked match immediately. Spend 10-15 minutes in the training ground or a classic mode warm-up. Try different weapons: M1014 for close range, MP40 for spray, SCAR for mid-range, and a sniper. Notice how the crosshair moves. If something feels off, tweak the specific scope sensitivity. For example, if you’re over-aiming with the 2x scope, drop it by 5 points. Use our how to test free fire sensitivity settings guide for a systematic approach. Once it feels natural, save your settings using the free fire sensitivity settings copy code feature to share with friends or keep as a backup.

Common Pitfalls
- Ignoring DPI consistency: If you switch to a different DPI (say 400 or 1600) but keep the same in-game numbers, your aim will feel completely different. Always lock your mouse to 800 DPI before using these settings.
- Copying settings blindly without testing: These values work for many, but everyone’s hand movement and mousepad friction differ. Always test and tweak. A free fire sensitivity settings for hybrid style might suit you better if you play both aggressively and passively.
- Forgetting to disable mouse acceleration: Windows Mouse Pointer Precision can mess with your aim. Go to Control Panel > Mouse > Pointer Options and uncheck “Enhance pointer precision.” Also turn off any mouse acceleration in your mouse software.
Where to Next?
You’ve got a solid 800 DPI sensitivity setup. Now it’s time to master the mechanics. Practice drag headshot drills, learn recoil patterns for your favorite guns, and consider crosshair placement. If you want to explore other styles, check out our free fire sensitivity settings for hybrid style for a balanced approach. And remember: sensitivity is personal, so don’t be afraid to experiment. Happy hunting!
