If you’re tired of missing shots in Free Fire and want a safe, zero-risk way to test sensitivity settings, custom rooms are your best friend. Whether you’re grinding for headshots or just want smoother aim, this guide will walk you through setting up and fine-tuning your sensitivity in a custom room. By the end, you’ll have a personalized sensitivity profile that works for your playstyle — no wasted rank points.
This guide is for anyone who wants to practice without pressure. Beginners can start from scratch, and veterans can use these steps to tweak their current settings. We’ll cover everything from creating the room to saving your perfect setup. Let’s jump in!
What You’ll Need
- A Free Fire account (level 8+ to create custom rooms)
- At least 5 minutes of uninterrupted time
- A notepad or screenshot tool to record your settings
- Basic knowledge of Free Fire’s settings menu
Step 1: Create a Custom Room
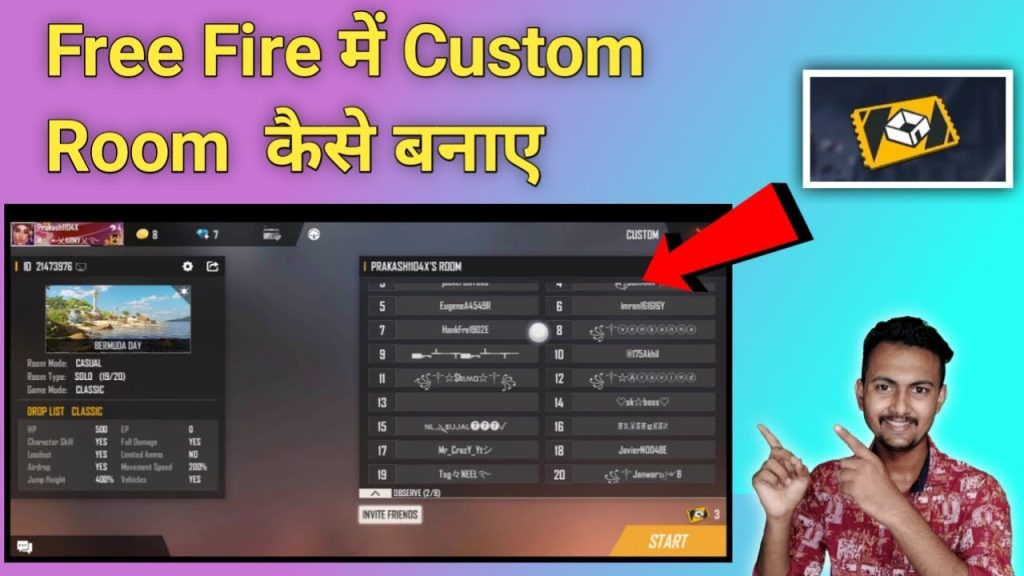
From the main lobby, tap on ‘Custom’ (it’s next to ‘Ranked’ and ‘Classic’). Then tap ‘Create Room’. Choose a battle royale or clash squad mode — I recommend Bermuda for open practice. Set room password to ‘sensitivity’ so friends can join if you want. Hit ‘Create’ and you’re in.
Step 2: Open Settings Inside the Room
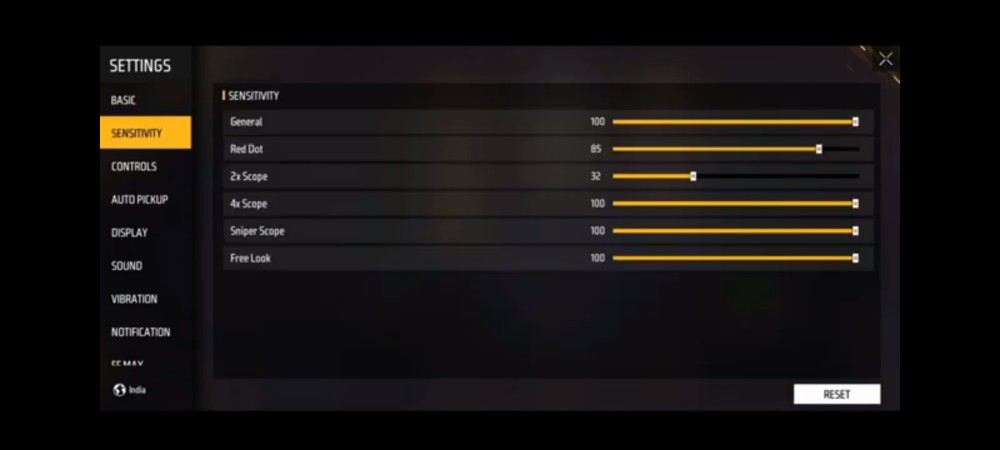
While waiting in the custom room lobby, tap the gear icon in the top right. This brings up the same settings you’d see in a normal match. Go to ‘Sensitivity’ tab. You’ll see sliders for General, Red Dot, 2x Scope, 4x Scope, etc. Don’t be overwhelmed — we’ll adjust them one by one.
Step 3: Adjust General Sensitivity First
General sensitivity controls how fast your screen moves when you swipe without aiming. A good starting point is 75-80 for most phones. If you have a high touch sampling phone, you can go lower (e.g., 65). Swipe right to increase, left to decrease. Test by looking around quickly — if you overshoot, lower it.
Step 4: Set ADS sensitivities
ADS (Aim Down Sight) sensitivities are just as important. Start with Red Dot: 80-90, 2x Scope: 70-80, 4x Scope: 50-60, Sniper Scope: 30-40. These values help you track enemies while scoped. Remember, you can always fine-tune later — the custom room lets you exit and re-enter settings anytime.
Step 5: Practice and Tweak
Start the match from the custom room. Land in a safe spot and practice shooting at walls, trees, or bots. Focus on flick shots and tracking moving targets. If you’re missing, pause and adjust the sliders in settings. Don’t be afraid to reset and try different numbers — that’s the beauty of custom rooms.
The best sensitivity is the one that feels natural. Don’t copy pro settings blindly — use them as a baseline and tweak until you land shots consistently.
Free Fire Pro Tips
Step 6: Save or Export Your Settings
Once you’re happy, take a screenshot of your settings or use the in-game export feature. Go to Settings > Sensitivity > Export Code to get a code you can share or reuse. This is handy for backing up your profile — check out our guide on how to import sensitivity settings code if you need help.
Common Pitfalls
- Copying pro settings without testing — Always tweak for your device and hand size. What works for a streamer may feel too fast or slow for you.
- Changing too many settings at once — Adjust one slider at a time, then test. Changing everything at once makes it impossible to know what’s working.
- Forgetting to save — After exiting the custom room, your settings are saved automatically. But if you reset your phone, you might lose them. Use the export code to keep a backup.
Where to Next
Now that you have a baseline, you can explore specialized setups. Try our auto headshot vivo settings for devices with high touch sampling, or check out the latest headshot sensitivity for a more aggressive approach. If you prefer a different scope style, our crouch shots sensitivity and one tap headshot settings might help. And don’t forget to use the high touch sampling setup if your phone supports it. Practice in custom rooms regularly, and you’ll see improvement fast!


