So you just unboxed a shiny new phone – maybe a Poco, a Realme, or a Xiaomi – and you’re itching to drop into Free Fire. But there’s one problem: the default sensitivity feels like you’re aiming through molasses. Your crosshair jerks, you over-flick, and that one-tap headshot is nowhere to be found. Relax, I’ve been there. This guide is for anyone who wants to skip the hour-long testing and get a sensitivity setup that works from the very first match. By the end of these steps, you’ll have a personal sensitivity that feels natural, gives you stable crosshair control, and even sets you up for drag headshots.
We’re not just throwing random numbers at you. These settings are battle-tested on new devices running high frame rates. You’ll learn how to fine-tune each slider, how to test in practice mode, and how to save your configuration so you never lose it. Whether you’re a beginner or a returning player, these steps will have you beaming enemies in no time. Let’s dive in.
What You’ll Need
- A new device (any brand – we’re focusing on settings, not hardware)
- Free Fire installed and updated to the latest version
- 5–10 minutes of uninterrupted time
- A stable internet connection (to practice against bots or in training mode)
- Optional: a friend to test in a custom room
Step 1: Reset Everything to Default
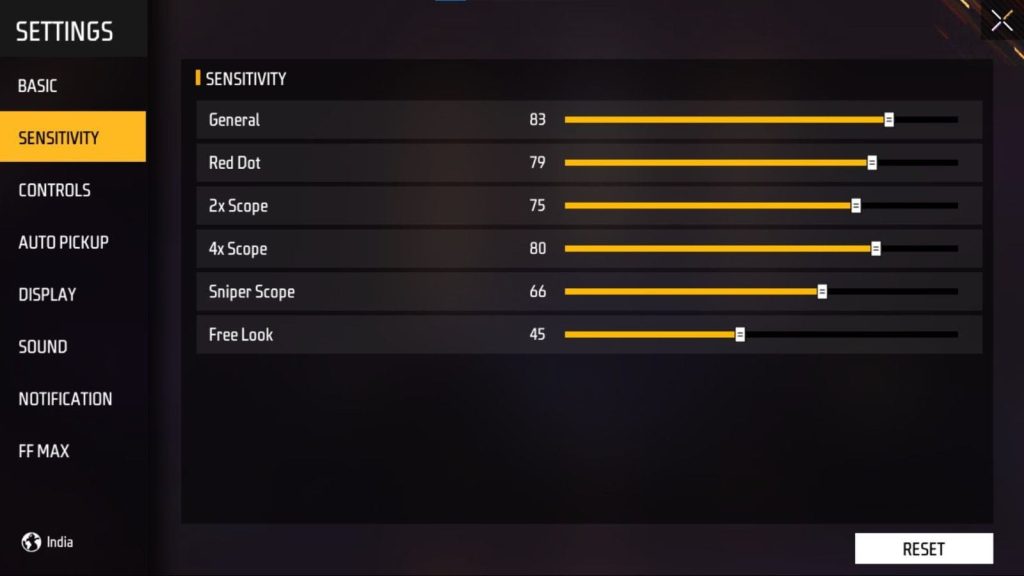
Before you even touch a slider, go to Settings > Sensitivity and hit ‘Reset to Default’. This clears any old data that might interfere. New phones often have different screen sizes and touch sampling rates, so starting fresh is key. You’ll see categories like General, Red Dot, 2x Scope, 4x Scope, Sniper, and Free Look. Don’t worry – we’ll cover them all.
Step 2: Set Your Base – General & Red Dot
Start with the two most used sensitivities: General (hip fire) and Red Dot. For a new device with 60+ FPS, set General to 80–85, Red Dot to 75–80. These numbers give you a fast but controllable spin speed. If your device has a high touch sampling rate (like 180Hz or above), you can go higher – 85–90. Test by moving your finger across the screen quickly. Does the crosshair overshoot? Lower by 3. Does it feel sluggish? Raise by 3.
Step 3: Tweak the Scopes – 2x, 4x, Sniper
For scoped weapons, you want stability. 2x Scope: 70–75. 4x Scope: 50–60. Sniper Scope: 30–40. Why so low? Because at high zoom, tiny finger movements translate to huge aim shifts. Lower values let you hold on targets longer. If you use a 6x scope, set it to 40–50. Free Look (the eye icon) keep at 70 – it helps with checking surroundings without moving your crosshair.
Step 4: Go to Practice Mode and Adjust
Now head to the training grounds. Spawn with an AR and a red dot. Practice tracking a stationary target, then moving targets. If you feel the crosshair is too shaky, reduce General by 5. If you can’t keep up with a running bot, increase Red Dot by 5. This is where you dial in the numbers. I recommend spending at least 5 minutes here. For a deeper breakdown, check out these practice mode drills – they’ll save you hours.
Step 5: Save Your Settings with a Code
Once you’re happy, tap the ‘Save’ button in the bottom right. Free Fire gives you a 12-digit code. Write it down or screenshot it. This is your saved code – you can share it with friends or use it if you ever reset. If you lose your phone, just copy that code into any other device and all your settings come back instantly.
Common Pitfalls
- Copying pro settings blindly: Pro players use high DPI or different device touch rates. Your new phone might feel completely different. Always tailor to your finger glide length.
- Ignoring the ‘Free Look’ sensitivity: A low Free Look can make you blind to enemies approaching from the side; too high and you’ll spin out of control. Keep it around 70.
- Not testing in an actual match: Practice mode is great, but real player movements are unpredictable. Play a Clash Squad match after setting up. If you miss shots, make small adjustments.
Where to Next
Congratulations – you now have a sensitivity tailored to your new device. Want to take it further? Check out our auto headshot settings for Xiaomi and Realme devices. If you’re on a budget phone, our low-end device settings will keep you lag-free. And if you just want the top sensitivity values that pros use, we’ve got that too. Don’t forget to bookmark your saved code so you never have to tweak again. See you in the lobby!



