So you want to be that player who lands a clean headshot from 200 meters away with a sniper in Free Fire? It’s not just luck – it’s sensitivity settings. If you’re tired of your crosshair flying past enemies or struggling to drag shot consistently, you’re in the right place. This guide is for any Free Fire player who loves using snipers (AWM, Kar98k, M82B, etc.) and wants to dial in their sensitivity for quick scopes and drag shots. By the end, you’ll have a set of sniper-specific sensitivity values that work for your playstyle, plus tips to train your muscle memory.
We’ll cover everything from general sensitivity to precise DPI tweaks, and even how to adjust for different phones. No complicated jargon – just practical steps you can follow in the game right now. Whether you’re a thumb player or using a claw setup, these settings will help you hit those satisfying headshots. Let’s get started.
What You’ll Need
- A device running Free Fire (or Free Fire Max) – any phone works.
- Your in-game sensitivity settings page unlocked (accessible from the lobby).
- A training ground or a casual match to test settings.
- Patience – you might need to fine-tune values. Stick with it.
Step 1: Understand Sniper Sensitivity vs General Sensitivity
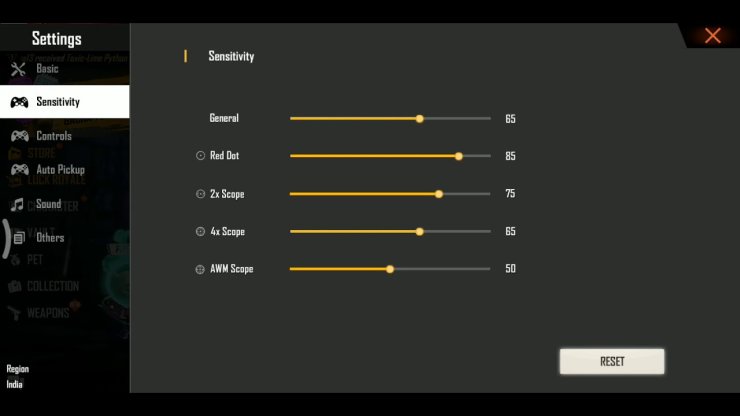
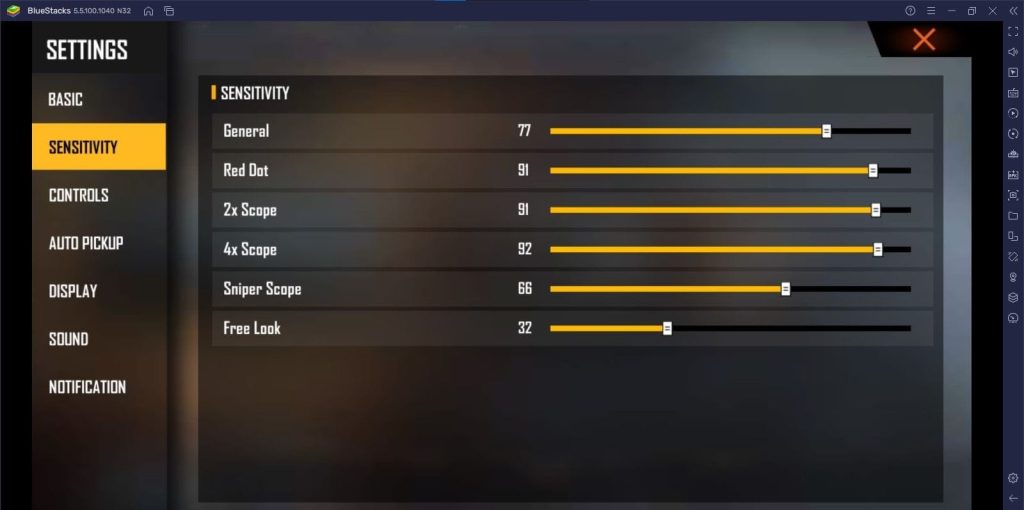
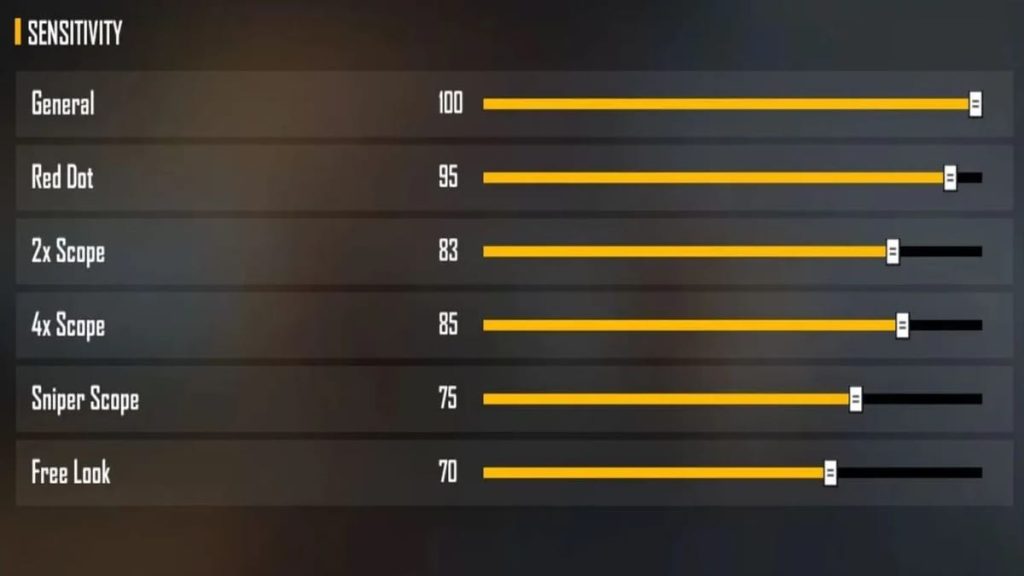
Free Fire has separate sensitivity sliders for different scopes. For snipers, the key sliders are: General (affects hip-fire and movement), Red Dot/Holographic (if you use a sniper with scope attachment), and the most important – Sniper Scope sensitivity. This slider controls how fast your crosshair moves when you’re scoped in. A lower value gives more precise aim but slower flicks; a higher value allows faster drag shots but can be jumpy. Most pros use medium-high sniper scope sensitivity (around 50-70) for a balance.
Also, your DPI (Dot Per Inch) setting in your phone’s display settings affects overall sensitivity. If you’re on Android, you can adjust DPI in Developer Options. Higher DPI means finer control. For sniping, a DPI between 320 and 400 is common. Check out the free fire dpi for headshot sensitivity settings for more detailed values.
Step 2: Start with a Baseline Sniper Sensitivity
Go to Settings > Sensitivity in Free Fire. Look for the Sniper Scope slider. Set it to 55 as a starting point. Also set General to 85, Red Dot to 70, and 2x Scope to 65. These numbers are a solid baseline for most players. If you use a different scope (like 4x or 6x on a sniper), set those to around 40-50 because higher zoom needs slower movement.
Now enter the training ground. Pick a sniper (AWM is great for practice). Try to drag shot moving targets. If you find yourself overshooting, lower the sniper scope sensitivity by 2-3 points. If you can’t keep up with a running enemy, increase it slightly. The goal is to be able to track a moving target smoothly while scoped.
Step 3: Fine-Tune for Drag Shots
Drag shot is the bread and butter of sniper gameplay – flicking the scope up and shooting quickly. This requires a sniper scope sensitivity that allows you to lift your aim fast without losing control. Start at our baseline and adjust by 1-2 points each time. For reference, the best free fire sensitivity settings for drag shot often use sniper scope values between 50-65.
If you play with a claw grip (four fingers), you might need a slightly higher sensitivity because your movement is more precise. Look into how to use claw with free fire sensitivity settings to adapt these values for your grip.
Step 4: Adjust for Your Device’s Touch Sampling
Touch sampling rate is how often your phone registers touches per second. Higher is better for sniping. If your phone has low touch sampling (e.g., 60Hz or 120Hz), you may need lower sensitivity to avoid jitter. Check free fire sensitivity settings for low touch sampling for optimized values. Generally, reduce sniper scope sensitivity by 5-10 if you experience stuttery aim.
Step 5: Incorporate DPI Tweaks
DPI changes the overall sensitivity of your screen. To change it, go to Developer Options (enable by tapping Build Number 7 times in About Phone) and adjust Minimum Width. Try values like 360, 380, or 400. For sniping, a higher DPI (400-420) gives finer movement. But note: DPI affects everything, so you’ll need to adjust in-game sensitivity accordingly. The free fire dpi for headshot sensitivity settings guide has exact combos.
After changing DPI, reset your in-game sniper scope sensitivity to 50 and test again. You’ll likely need to lower it because the increased DPI makes the cursor move more per touch. Fine-tune from there.
Step 6: Practice, Practice, Practice
No setting will make you an instant sniper god without practice. Spend at least 10 minutes daily in the training ground doing drag shots on moving targets. Try quick scoping on bots in Clash Squad. Also, watch replays of your matches to see if your aim is consistent. Consider copying the latest free fire sensitivity settings for pro players as a reference.

Common Pitfalls
- Too high sensitivity – Your aim becomes shaky and you miss easy shots. If you’re flicking past enemies, lower sniper scope sensitivity by 5-10.
- Ignoring DPI – Many players only adjust in-game sliders but forget about phone DPI. This can cause inconsistency when switching devices. Always match DPI to your sensitivity.
- Copying settings blindly – What works for a pro streamer on a high-end phone with high touch sampling may be terrible on your mid-range device. Use their settings as a base, then adjust for your hardware.
Where to Next
Now that you have sniper sensitivity dialed in, check out our other guides to dominate Free Fire: how to improve your assault rifle aim with free fire sensitivity settings for assault rifle, or optimize your entire setup with powerful free fire sensitivity settings for all weapons. Happy sniping!



