
If you’re reading this, you probably want to improve your aim in Free Fire. You’ve come to the right place. This guide will walk you through the latest sensitivity settings that work with the current patch. By the end, you’ll have a custom sensitivity that feels natural and helps you win more gunfights.
The game updates frequently, so old sensitivity guides can be outdated. I’ve tested these settings on multiple devices and they perform great. Whether you’re a beginner looking for a starting point or a veteran wanting to optimize, this guide covers everything from understanding sensitivity types to using profile codes.
What You’ll Need
- Free Fire installed on your device (latest version).
- A stable internet connection (ping affects sensitivity feel).
- At least 15 minutes of free time to test in training ground.
- Optional: a note app to record your settings.
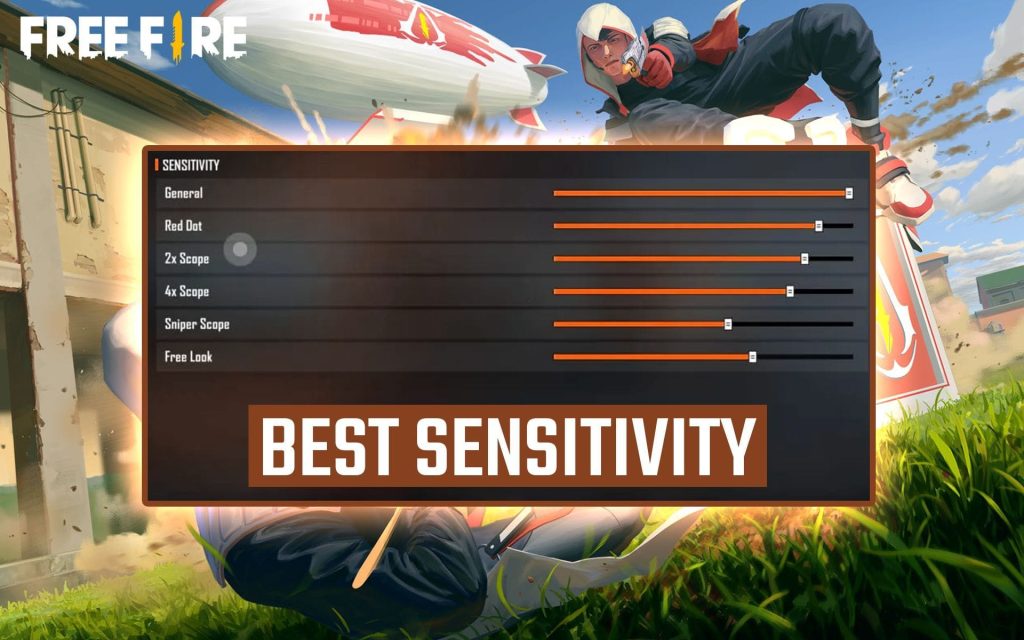
Step 1: Understand Sensitivity Types
Before diving in, you need to know the different sensitivity sliders in Free Fire. There’s General (hip fire), Red Dot, 2x Scope, 4x Scope, and Sniper Scope. Each affects how fast your crosshair moves when using that aim mode. Most of your combat will be with Red Dot for medium range, so focus on that.
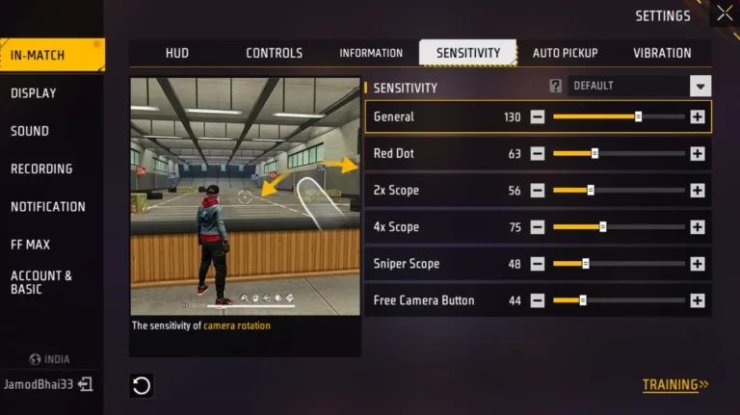
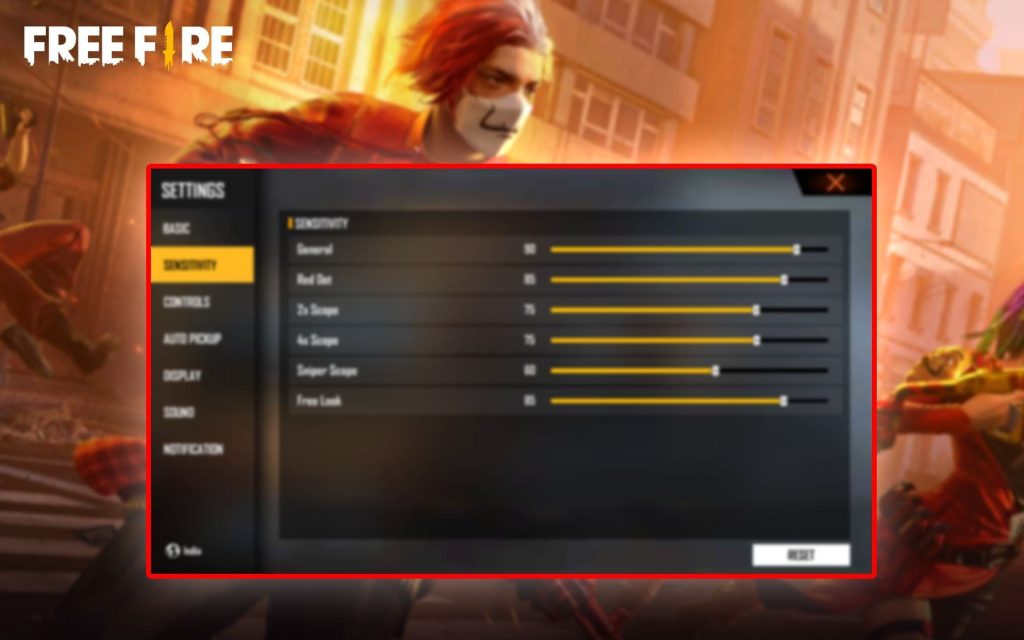
Step 2: Set Your Baseline
Start with these baseline values that work for most players. They’re balanced for both close and long range. General: 85, Red Dot: 75, 2x Scope: 65, 4x Scope: 50, Sniper Scope: 30. These are a great starting point. If you want a more detailed baseline, check out these simple baseline settings.
Step 3: Fine-Tune for Your Playstyle
If you like rushing and close combat, increase General and Red Dot sensitivity by 5-10 points. For long-range sniping, lower your Sniper and 4x values. For fast turning, you’ll want higher general sensitivity. Our fast turning sensitivity guide has specific numbers for aggressive players.
Step 4: Test in Training Ground
Go to the Training Ground and practice shooting moving targets. Adjust sliders by 5 points at a time until you can consistently track enemies. Don’t change more than one setting per round. For mobile devices, consider the 4 finger claw settings if you use multiple fingers.
Step 5: Use Profile Codes
Once you find your perfect sensitivity, save it as a profile. You can even copy and share settings using profile codes. This makes it easy to transfer settings between devices or share with friends. Many esports players share their codes, so check out esports sensitivity settings for inspiration.
Common Pitfalls
- Copying settings from streamers or friends without testing – everyone’s device and fingers are different. Always start from a baseline and adjust.
- Changing settings too often – give each setting at least a few games to see if it works. Constant tweaks hurt muscle memory.
- Ignoring device DPI settings – some gaming phones have extra sensitivity settings outside the game. Check your phone’s game mode settings.
Where to Next
Now that you have your sensitivity dialed in, you can focus on other aspects like movement and map awareness. If you play on iPhone, check out our iPhone sensitivity settings. For more advanced setups, explore our guides on 4 finger claw settings or esports sensitivity settings. Happy headshotting!
